
If your vehicle’s dashboard shows a battery warning light, headlights dim, or you experience stalling and starting issues, your alternator might be the culprit. You can perform quick tests at home by checking your battery voltage with a multimeter—around 12.6V off and 13.8-14.4V when running indicates proper charging. Look for loose belts, corroded connections, or unusual noises. For more tips on diagnosing and fixing alternator problems, keep exploring how to stay ahead of electrical issues.
Key Takeaways
- Dashboard warning lights and dimming headlights indicate possible alternator failure.
- Use a multimeter to check for 13.8-14.4V output with the engine running.
- Inspect battery terminals for corrosion and ensure tight connections.
- Listen for unusual noises or belt slippage during alternator operation.
- Persistent electrical issues or starting problems signal the need for professional diagnosis.

ANCEL BA101 Car Battery Tester, 12V Digital Automotive Alternator Meter Diagnostic Tool,100-2000 CCA Load Capacity, Charging & Cranking Analyzer for Truck, Boat, RV, Marine Vehicle, and More
Feature Highlights: This 12V battery tester is a reliable tool for vehicle maintenance. It offers quick tests for…
As an affiliate, we earn on qualifying purchases.
As an affiliate, we earn on qualifying purchases.
What Are the Signs of Alternator Charging Problems?
When your alternator isn’t charging properly, you’ll notice several clear signs that something’s wrong. One common indicator is a battery warning light on your dashboard, which signals your vehicle’s electrical system detects a problem. You might also experience dim headlights, especially at night or when using electrical accessories. These symptoms happen because the alternator isn’t providing enough power to keep the battery charged and run your vehicle’s electrical systems efficiently. You could also notice your vehicle stalls unexpectedly or struggles to start. Pay attention to these warning signs, because ignoring them can lead to further electrical issues or a complete breakdown. Additionally, understanding the different types of alternators can help in diagnosing specific charging issues more accurately. Being familiar with alternator maintenance practices can also prevent future problems and extend the lifespan of your vehicle’s charging system. Regular inspections and keeping the electrical connections clean are essential components of effective alternator upkeep. Performing quick tests such as voltage checks can help you determine whether your alternator needs professional attention, especially when combined with knowledge of diagnostic procedures.

Klein Tools MM325 Multimeter, Digital Manual-Ranging 600V AC/DC Voltage Tester, Tests Batteries, Current, Resistance, Diodes, and Continuity
VERSATILE FUNCTIONALITY: Measures AC/DC voltage up to 600V, 10A DC current, 2MΩ resistance; additional features include continuity, diode…
As an affiliate, we earn on qualifying purchases.
As an affiliate, we earn on qualifying purchases.
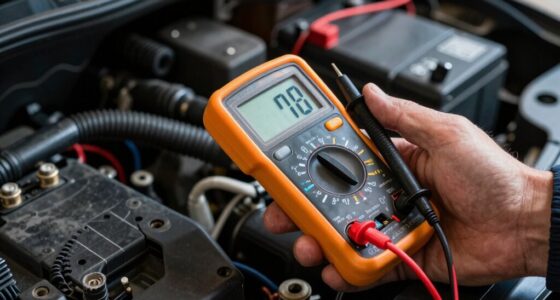
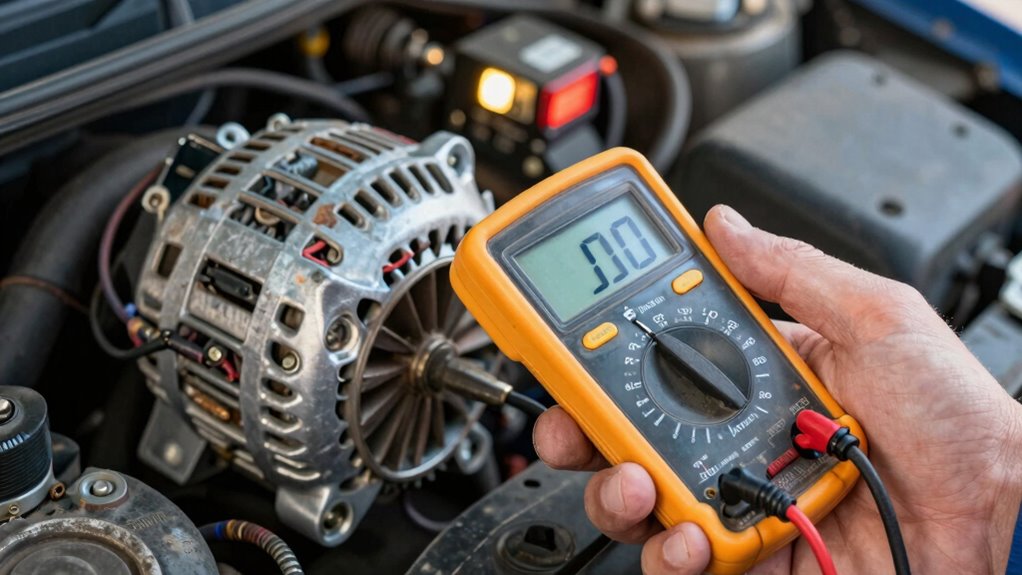
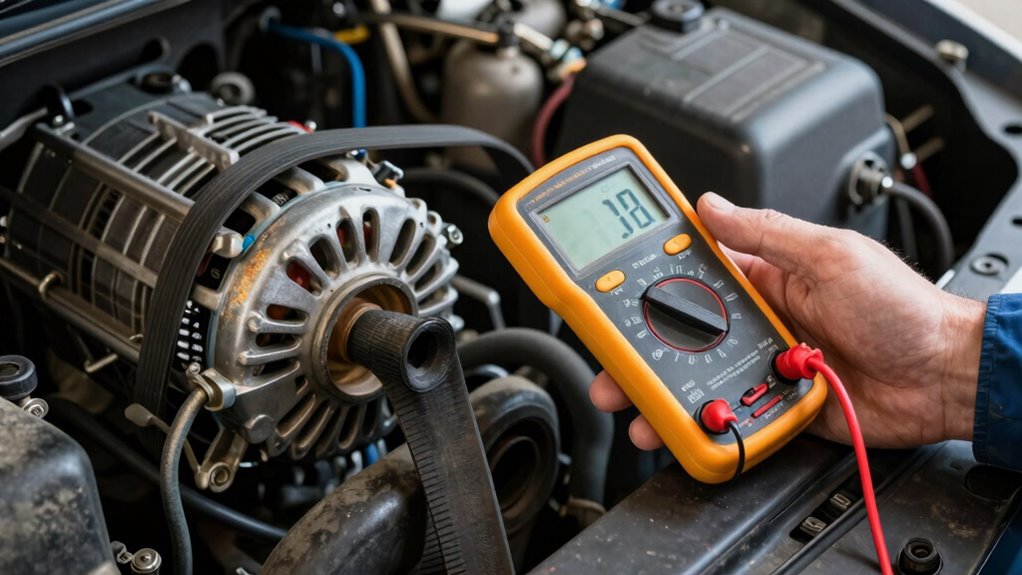
How to Test Your Alternator and Battery at Home
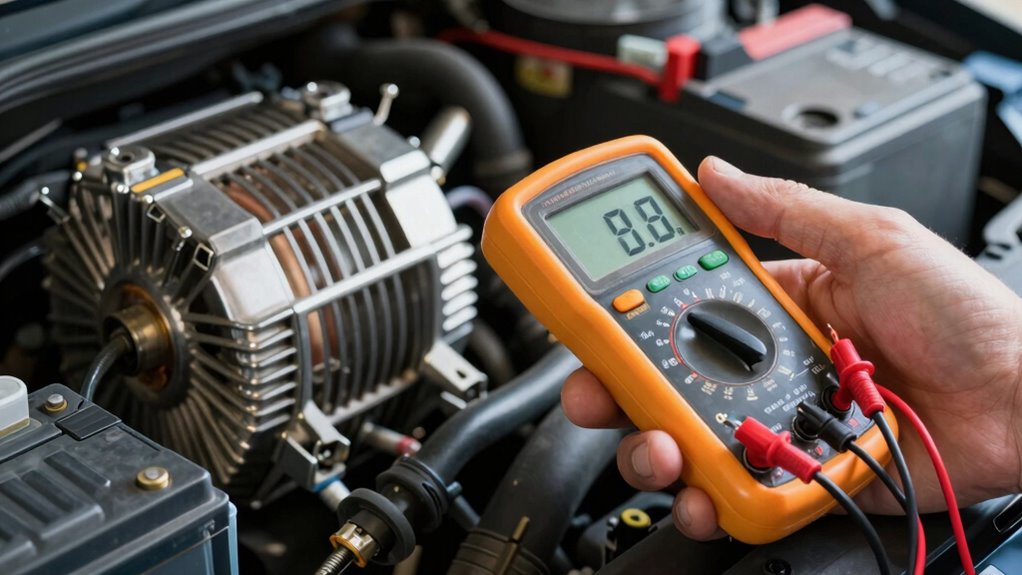
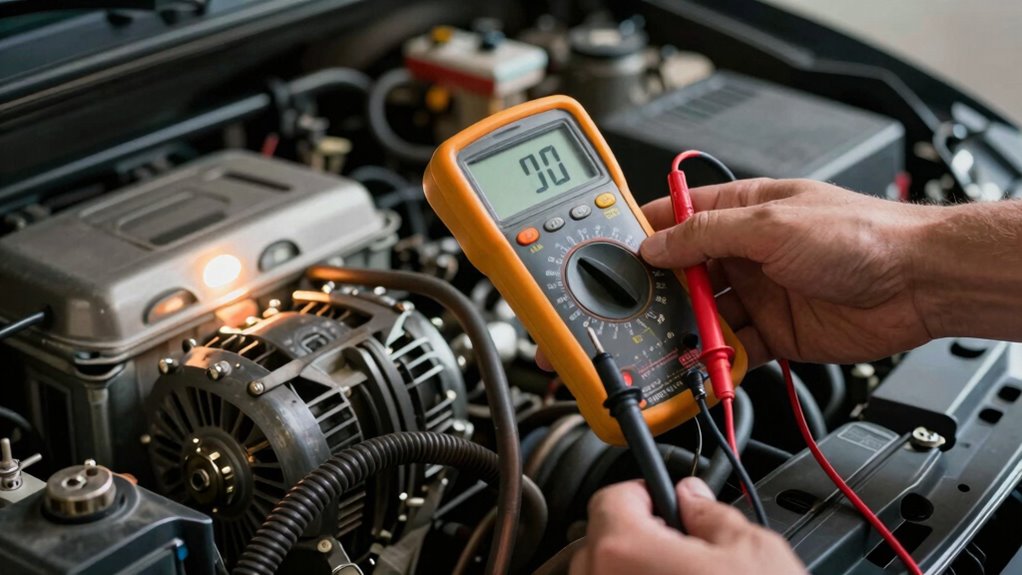
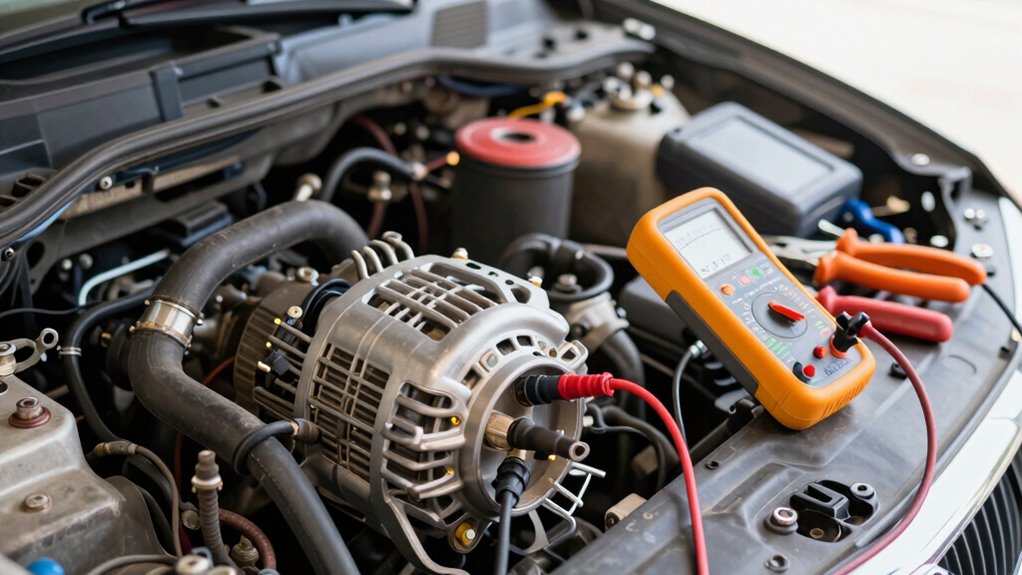
Testing your alternator and battery at home is a straightforward process that can help you identify potential electrical issues before they become serious. Regular battery maintenance and quick at-home tests can save you time and money on unnecessary repairs. Start by checking the battery terminals for corrosion and ensuring they’re tight. Use a multimeter to measure voltage; a healthy battery should read around 12.6 volts with the engine off. When you start the engine, the voltage should increase to 13.8-14.4 volts, indicating the alternator is charging correctly. It’s also helpful to understand how electrical systems work to interpret your test results accurately. Consider these steps: – Inspect battery terminals for corrosion and secure connections – Use a multimeter to check voltage levels – Turn on headlights to see if they dim when starting – Listen for unusual noises during alternator repair – Perform a simple load test if needed. Additionally, understanding battery health indicators can help you determine if a replacement is necessary before failure occurs. Being familiar with voltage regulation can also assist in diagnosing charging system problems more effectively. Regularly testing your system can also help identify early warning signs of impending failure, saving you from unexpected breakdowns. Furthermore, staying informed about alternator failure symptoms can help you recognize issues promptly and prevent potential roadside emergencies.

TKDMR Battery Terminal Cleaners (2 pcs),12 pcs Battery Terminal Anti-Corrosion Fiber Washers (6 Red & 6 Green) for Car Marine Battery
Quantity: comes with 10 pieces battery anti-corrosion washers(5 red & 5 green) and 2pcs Battery Terminal Cleaning Brush.
As an affiliate, we earn on qualifying purchases.
As an affiliate, we earn on qualifying purchases.
How to Read Voltage Levels and Diagnose Alternator Issues
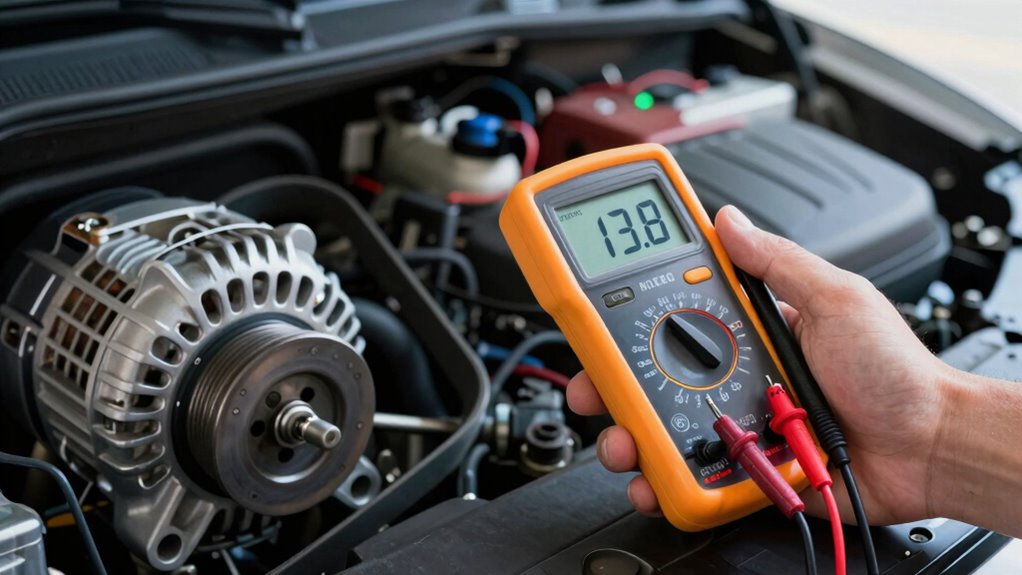
Reading voltage levels with a multimeter is a quick way to diagnose your alternator’s performance. To do this, set your multimeter to DC volts and connect the red lead to the battery’s positive terminal, then the black lead to the negative terminal. Start your engine and observe the voltage reading. A healthy charging system typically shows between 13.8 and 14.8 volts. If the voltage is lower, the alternator might not be charging properly. Conduct a circuit inspection by checking connections for corrosion, looseness, or damage, as these can cause inaccurate voltage readings. Proper circuit inspection ensures you identify issues like loose wires or corrosion that can affect voltage output. Additionally, you can perform a voltage test at different points in the system to pinpoint where the problem may be originating. For accurate diagnosis, it’s also helpful to verify the integrity of the battery terminals, since poor connections here can mimic alternator problems. Regular battery maintenance can prevent false diagnostics and ensure reliable readings. Performing a visual inspection of the alternator belt and pulley can help identify mechanical issues that affect charging. Consistent, proper voltage levels indicate a well-functioning alternator circuit. If readings fall outside the normal range or fluctuate, it’s a sign to investigate further for potential issues.

ApplianPar Alternator Air Conditioning Belt and Power Steering Serpentine Belt Kit for Toyota Avalon 1995-2010
Replaces part numbers: 4PK880, 6PK1035
As an affiliate, we earn on qualifying purchases.
As an affiliate, we earn on qualifying purchases.
What Causes Alternator Charging Problems?
Alternator charging problems often stem from issues with the electrical components or connections that support the charging system. A worn or loose alternator belt can slip, reducing the alternator’s ability to generate power. Faulty wiring connections, especially around the alternator and battery, can interrupt the flow of electricity. Corrosion or damaged wires may cause poor contact, leading to charging issues. Additionally, a failing voltage regulator can prevent the alternator from maintaining proper voltage levels. Finally, debris or dirt buildup on the alternator itself can impair its function. Regular inspection of the alternator belt and wiring connections helps prevent these problems. Proper electrical system maintenance is crucial for preventing such issues. Regularly checking for corrosion or damaged wires and cleaning the alternator can help maintain optimal performance. Additionally, monitoring the alternator belt tension can prevent slipping and ensure consistent charging.
When Should You See a Mechanic for Alternator Troubles?
Knowing when to consult a mechanic for alternator issues can save you from unexpected breakdowns and costly repairs. If your dashboard warning lights come on or your headlights dim unexpectedly, it’s time to seek professional help. Even if you’ve tried DIY repairs using diagnostic tools, persistent problems like a dead battery or frequent stalling indicate deeper alternator trouble. Attempting repairs beyond basic checks can be risky and may cause further damage. When simple troubleshooting doesn’t resolve the issue, a mechanic has the expertise and specialized equipment to diagnose the problem accurately. Recognizing vehicle electrical system issues and their symptoms can help you better understand your car’s needs. Don’t ignore warning signs or rely solely on DIY solutions if symptoms worsen or persist. Seeing a mechanic early can prevent a complete alternator failure and save you money in the long run.
Frequently Asked Questions
Can a Bad Alternator Cause Electrical Issues Beyond Battery Charging?
Yes, a bad alternator can cause electrical issues beyond just charging the battery. It might lead to dimming headlights, faulty gauges, or even vehicle stalling. Conduct electrical system diagnostics to identify problems early. Regular alternator maintenance tips, like checking connections and belt tension, help prevent issues. If you notice electrical glitches, get your alternator tested promptly to avoid further damage and ensure your vehicle runs smoothly.
How Often Should I Test My Alternator to Prevent Problems?
Think of your alternator as your car’s heartbeat. To keep it steady, you should perform routine inspections every 6-12 months, especially before long trips or seasonal changes. Incorporate preventive maintenance by checking the charging system regularly, testing the alternator’s output, and watching for warning signs. This proactive approach helps prevent unexpected failures, ensuring your vehicle’s electrical system stays reliable and your journey remains smooth.
Are There Any Visual Signs of Alternator Failure Besides Dashboard Warnings?
Yes, during a visual inspection, look for signs of alternator failure like a slipping or cracked belt, which can affect performance. You might also notice corrosion or burnt smell around the alternator. Additionally, check for loose or damaged wires connecting the alternator. These visual signs can indicate issues before dashboard warnings appear, helping you catch problems early and prevent breakdowns.
What Tools Are Recommended for DIY Alternator Testing?
To test your alternator yourself, you’ll need a multimeter for testing voltage output—set it to DC volts and check across the battery terminals with the engine running; it should read around 13.8-14.4 volts. Also, inspect the belt for cracks or looseness, as a slipping belt can cause charging issues. These tools help you identify if your alternator is functioning properly or if you need professional help.
Can a Faulty Alternator Damage Other Vehicle Components?
Yes, a faulty alternator can damage other vehicle components. If it overcharges, it may cause battery corrosion, leading to poor electrical connections. Additionally, you might notice alternator noise, which indicates internal issues. These problems can strain the vehicle’s electrical system, damaging sensitive electronics and other components over time. It’s essential to address alternator problems promptly to prevent further damage and make certain your vehicle runs smoothly.
Conclusion
If your car shows warning signs, if your battery drains, or if your dashboard lights flicker, don’t ignore them. Test your alternator, check your voltage, and understand the signs. Take action early, seek help when needed, and keep your vehicle running smoothly. Stay alert, stay proactive, and keep your engine alive. Because a healthy alternator means a reliable ride, peace of mind, and confidence on every journey.