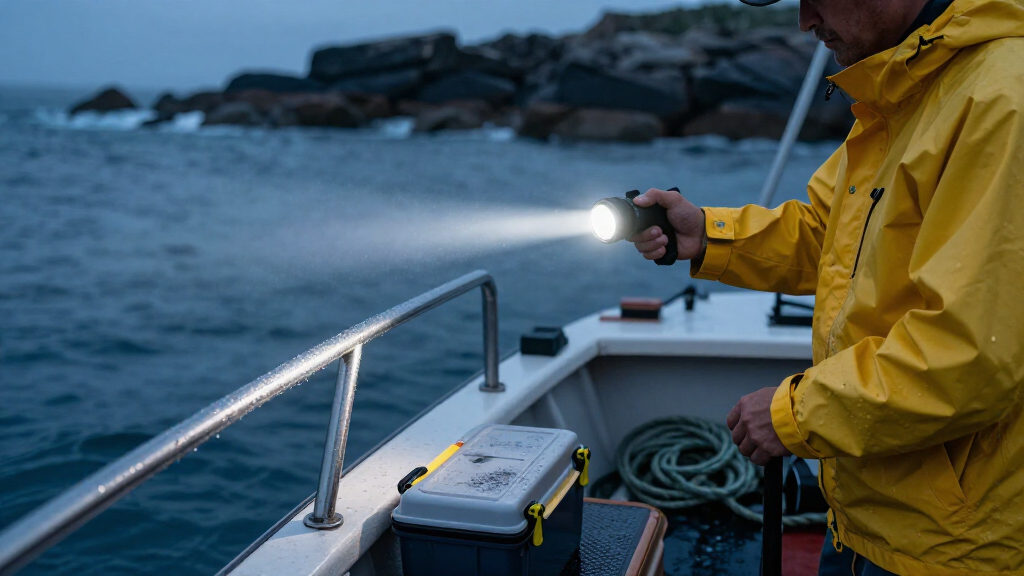

This guide shows you how to choose, prepare, test, and maintain a marine waterproof LED flashlight so it works reliably on a boat, kayak, dock, or dive site. You will learn how to read waterproof ratings, inspect and lubricate seals, perform a pre-season pressure test, and set up a maintenance routine that prevents the most common cause of failure: water intrusion through neglected O-rings.

Get sports gear delivered free with Prime
- Fast, free delivery on millions of items
- Prime Video, Amazon Music and more included
- Member-only deals all year

Durapower Rechargeable IP68 Waterproof Spotlight
- ✔ Waterproof rating: IP68, submersible to 6 ft
- ✔ Beam throw: Up to 1,400 ft
- ✔ Peak intensity: 42,000 candela

YIERBLUE Rechargeable Spotlight Flashlight
- ✔ Waterproof rating: IP67, submersible to 3 ft, floats
- ✔ Beam throw: Up to 1,000 ft
- ✔ Runtime: Up to 12 hours (low setting)

Coast G60R 1000 Lumen Waterproof Rechargeable Flashlight (2-Pack)
- ✔ Waterproof rating: IP67, submersible to 1 m
- ✔ Max output: 1,000 lumens
- ✔ Beam type: Twist-focus flood-to-spot
This guide is written for boat owners, kayakers, anglers, sailors, and divers who need a dependable light around salt water. No prior technical knowledge is required — if you can open a battery compartment and apply grease with a fingertip, you can complete every step here.
Expect to spend one to two hours on initial selection and testing, and about fifteen minutes per season on upkeep. The most common failure mode in marine flashlights is not the LED or the battery — it is a corroded contact or a dried-out seal. The steps below are organized to prevent exactly that.
Difficulty: Beginner | Time: 1-2 hours for selection and setup; 15 minutes for routine maintenance
What You’ll Need
Tools & Materials:
- Marine-rated LED flashlight (IPX7 minimum, IPX8 preferred)
- Silicone-based O-ring grease (never petroleum-based)
- Cotton swabs or lint-free cloth
- Isopropyl alcohol (90% or higher)
- Fresh batteries or a charged rechargeable cell
- A bucket, sink, or basin deep enough to submerge the light
- Small soft brush (old toothbrush works)
- Optional: replacement O-rings sized to your model
Knowledge:
- How to open and close the battery compartment of a flashlight
- Basic understanding that salt water accelerates corrosion
- Familiarity with your boat’s or activity’s storage conditions
Before you buy or test anything, locate the flashlight’s IP rating and depth rating. These are printed on the packaging, the body of the light, or the manufacturer’s specification sheet. An IPX7 rating means the light survives submersion to 1 meter for 30 minutes — adequate for deck use and rain. An IPX8 rating means the manufacturer specifies a greater depth, often 2 meters or more, which is what you want for diving, overboard recovery, or anything that may spend real time underwater. A light labeled only “water-resistant” is neither of these and should not be trusted around salt water.
If you plan to dive, confirm the light carries an explicit depth rating in meters or feet (for example, “rated to 100 meters”) and that the manufacturer states it is suitable for diving. IPX8 alone does not guarantee diving suitability.
Durapower Rechargeable IP68 Waterproof Spotlight
When a flashlight is marketed squarely at boats, we hold it to a marine standard, and the Durapower clears that bar more convincingly than anything else here. Its IP68 rating with 6-foot submersion tolerance doubles the effective depth of the two IP67 lights, and its heavily rubberized shell means there are fewer seams and buttons for salt water to attack over a season of use. On the water, the practical difference matters: an IP67 light that gets pinned under a swamped deck or sits in a flooded bilge for more than half an hour can fail, while this one is built for exactly that scenario.Its tight focused beam reaches roughly 1,400 feet, out-throwing the YIERBLUE by a wide margin and putting the Coast G60R far behind in raw distance. That reach is what makes it genuinely useful for marking channel markers, scanning a dark shoreline, or spotting a mooring after sunset. The 24-hour runtime on a single charge also beats both rivals on endurance, and the included 12V vehicle charger is a smart touch for topping up from a boat’s accessory outlet.The tradeoffs are real, though. Unlike the YIERBLUE, it does not float, so a drop over the rail means a lost light. And compared with the Coast’s twist-focus beam, its spot is fixed and narrow — great at distance, less friendly for lighting up an entire deck or engine bay. If your priority is flood lighting rather than reach, the Coast is the better tool.
Pros:
- IP68 rating handles 6-foot submersion, the deepest in this lineup
- 1,400-foot beam throw with 42,000 candela intensity
- 24-hour runtime with power indicator
- Rubber-armored body survives 10-foot drops
- Includes a 12V charger for boat or vehicle charging
Cons:
- Does not float, so it is gone if dropped overboard
- Fixed narrow beam is poor for illuminating wide areas nearby
- Single-unit pack offers no backup light
Best for: Boaters and anglers who need the deepest waterproofing and longest beam throw for night navigation and open-water work
Not ideal for: Anyone who wants a floating light or a wide flood beam for close-quarters deck work
Bottom line: The most marine-ready light of the three, trading floatability and flood coverage for superior depth rating, reach and runtime.
“The most marine-ready light of the three, trading floatability and flood coverage for superior depth rating, reach and runtime.”
YIERBLUE Rechargeable Spotlight Flashlight
Here is the pick that solves the most heart-sinking problem in marine lighting: the overboard drop. The YIERBLUE is IP67 waterproof and submersible to 3 feet, but crucially it floats back to the surface — something neither the Durapower nor the Coast G60R can claim. For anyone fishing from a small boat, kayak, or dock, that single trait may outweigh every other spec on the page, because a light you can scoop back out of the water is worth more than one with a longer throw sitting on the bottom.Performance-wise it sits sensibly between our other two picks. Its focused beam reaches about 1,000 feet — short of the Durapower’s reach but dramatically beyond the Coast — and the intelligent illumination driver keeps output consistent rather than fading as the battery drains. Runtime stretches to 12 hours on low, with a 4-hour USB-C recharge that is faster to refill than the Durapower’s slower top-up. We also rate the extras: a foldable stand for hands-free operation when you are working on an engine at night, and a removable red filter that preserves night vision on the water.Where it trails the Durapower is depth and throw — IP67 with 3-foot tolerance is fine for spray, rain, and brief dunks, but not sustained submersion. And its ABS-and-silicone housing, while rated for drops, does not feel as overbuilt as the Durapower’s rubber-armored shell. Compared with the Coast, it is larger and heavier to stow, so it is a spotlight rather than an everyday pocket light.
Pros:
- Floats when dropped in water — unique in this lineup
- 1,000-foot beam with non-fading brightness driver
- 12-hour runtime on low with 4-hour USB-C charging
- Foldable stand and removable red filter add genuine versatility
- Rated for 10-foot drops at under one pound
Cons:
- IP67 tops out at 3-foot submersion, half the Durapower’s depth
- Larger than a conventional flashlight, so it is not pocket-friendly
Best for: Small-boat anglers, kayakers, and hunters who want a bright floating light with hands-free extras
Not ideal for: Boaters who need deep-submersion protection or a compact light for a pocket or life vest
Bottom line: The best-value spotlight here and the only one that survives an overboard drop by design, trading deep-water sealing for floatation and versatility.
“The best-value spotlight here and the only one that survives an overboard drop by design, trading deep-water sealing for floatation and versatility.”
Coast G60R 1000 Lumen Waterproof Rechargeable Flashlight (2-Pack)
Not every marine lighting job needs a searchlight. Sometimes you want a light clipped inside the cabin, one in the ditch bag, and one you can operate one-handed while holding a line — and that is the niche the Coast G60R occupies. Sold as a two-pack of slim, 1,000-lumen flashlights, it takes a completely different approach from the two handheld spotlights above: modest throw, but far better ergonomics for close work.Its defining feature is the twist-focus optic. Rather than a fixed narrow beam like the Durapower, you dial smoothly from a wide flood for lighting a deck or cabin to a spot for checking a buoy a few hundred feet out. Around an engine compartment or a galley at night, that flexibility beats raw candela every time. The IP67 dust and waterproof rating covers rain, spray, and brief submersion to a meter, which is adequate for coastal and inland boating even if it trails the Durapower’s IP68. And a thoughtful lockout mode prevents accidental activation in a locker or bag — a small detail, but one that saves your battery for when it counts.The compromises are obvious: no floating body, a shorter beam than either spotlight, and a runtime that, while reasonable, cannot touch the YIERBLUE’s 12-hour endurance. The built-in ZITHION battery also means no swapping in fresh cells mid-trip; you charge it or you carry both units. That is precisely why the two-pack format makes sense — one light can always be on charge while the other stays in your pocket.
Pros:
- Twist-focus beam shifts from flood to spot for real versatility
- Two lights in one pack for helm-plus-emergency stowage
- IP67 sealed against spray, rain, and brief submersion
- Lockout mode prevents battery drain in storage
- Rechargeable built-in battery saves on disposables
Cons:
- No floating body — a drop overboard is a lost light
- Beam reach falls well short of both spotlights
- Sealed battery cannot be swapped on long trips
Best for: Crews and coastal boaters who want compact, versatile everyday flashlights stashed in multiple spots aboard
Not ideal for: Open-water boaters needing maximum beam throw or deep submersion protection
Bottom line: The practical pick for onboard everyday lighting, where beam flexibility and having a spare matter more than distance records.
“The practical pick for onboard everyday lighting, where beam flexibility and having a spare matter more than distance records.”
As an Amazon Associate we earn from qualifying purchases.
Before You Start
Do three things before the first test. First, read the manual for your specific model — some lights have a lockout feature or a proprietary charging port that changes the sealing procedure. Second, confirm the O-rings are present and seated: unscrew the tail cap or head and look for one or two rubber rings sitting in grooves on the threaded sections. If an O-ring is missing, cracked, or flattened, order a replacement before doing anything else; a missing O-ring guarantees flooding. Third, decide where you will perform the water test — a sink or bucket indoors is fine, and doing it indoors makes leaks easier to spot.
Warning: Never test a light underwater with the tail cap or head partially unscrewed, and never use petroleum-based grease (like Vaseline or standard multipurpose grease) on O-rings. Petroleum degrades rubber and silicone seals over weeks, causing leaks that appear long after you have stopped thinking about the light.
Step-by-Step Instructions
Step 1: Match the flashlight to your marine use
Define what the light is for before comparing models. For deck work, boarding at night, and emergency signaling, choose a light with an IPX7 rating, 300–600 lumens, and a strobe mode. For diving, recovering gear from the water, or extended submersion, select an IPX8 light with a stated depth rating at least double your expected depth. For a ditch bag or life jacket mount, pick a compact light with a lanyard hole and a single simple switch that works with cold or gloved hands.
Check four specification items on any candidate light: the IP rating, the runtime on medium (not maximum) output, the battery type, and whether the body is advertised as corrosion-resistant aluminum with Type II or Type III anodizing or a polymer shell. Compare the runtime figures — a light that drops from 500 lumens to 50 within twenty minutes is less useful than a steadier 300-lumen beam that holds for hours.
Tip: Choose a common battery format (AA, AAA, or 18650) over proprietary packs. On a boat, being able to swap in whatever batteries you can find matters more than a marginal gain in output.
Check: You have selected a light whose IP rating and depth rating match or exceed your intended use, with a battery type you can actually replace mid-season.
Step 2: Inspect the seals
Unscrew the head and tail cap. Remove each O-ring by rolling it gently off its groove with a fingertip. Stretch it slightly and examine its entire circumference under good light. Look for cracks, nicks, flat spots where the ring has been compressed, and any stickiness or deformation. Run your finger along the groove in the flashlight body and confirm it is clean — no sand, salt crystals, hair, or manufacturing debris.
Reinstall each intact O-ring into its groove. Replace any damaged ring with the manufacturer’s part or a correctly sized replacement before using the light around water.
Tip: Roll the O-ring, do not pry it with a metal tool. A screwdriver tip will nick the rubber and create a leak path invisible to the eye.
Check: Each O-ring sits fully in its groove, is round rather than flattened, and shows no visible cracks or nicks.
Step 3: Clean and lubricate the O-rings and threads
Wipe each O-ring with a lint-free cloth lightly dampened with isopropyl alcohol. Let it dry for a minute, then apply a thin film of silicone grease along the entire ring — enough to make it glossy, not enough to collect in blobs. Wipe the threaded sections of the body with the alcohol cloth, let them dry, and spread a faint smear of the same silicone grease onto the threads.
Screw the head and tail cap back on until they stop with light hand pressure. Stop there; do not force them past the stop. Overtightening squeezes the O-ring out of its groove and creates the very leak you are trying to prevent.
Tip: Less grease is better than more. Excess grease attracts sand and grit, which then grind into the seal every time you open the light.
Check: The threads turn smoothly without grinding, the caps close fully with moderate hand pressure, and the O-rings look wet but not dripping.
Step 4: Test the light dry
Install fresh batteries or a fully charged cell, observing polarity. Cycle the light through every mode: high, medium, low, strobe, and any SOS function. Press the switch repeatedly and check for positive engagement — each press should give a clear click or mode change without double-triggering. Point the beam at a wall and watch it for two minutes to confirm the output is steady, not flickering. Flicker indicates a loose battery contact or dirty spring.
If the light flickers, open it, clean the contact springs and battery terminals with an alcohol-dampened cotton swab, let them dry, and retest before proceeding.
Check: All modes switch cleanly, the beam is steady for at least two continuous minutes, and the switch responds on every press.
Step 5: Submerge the light to test the seals
Fill a bucket or sink with fresh water. Switch the fully assembled light on, lower it into the water, and hold it submerged at the bottom for 15 minutes. Rotate it a few times and press the switch underwater several times to simulate real use. Remove it, dry the exterior with a towel, and — this is the critical part — unscrew the head and tail cap over a dry cloth and inspect the inside.
Look for any water, fogging, or droplets inside the battery tube, on the contacts, or under the lens. Treat a single droplet as a failed seal. Accept slight fogging under the lens on a passing light — that is trapped humid air and is cosmetic; water in the battery tube is not.
Tip: Test in fresh water only. Salt water in a failed seal means immediate corrosion cleanup, which is a larger job than the test itself.
Check: The interior of the battery tube and both ends of the light are completely dry after 15 minutes of submersion with the switch cycled underwater.
Step 6: Rinse, dry, and store the light correctly
Rinse the exterior of the light in fresh water after every salt-water outing — salt crystals left on the body work their way into threads and seals. Dry the light completely with a towel, then loosen the tail cap a quarter turn before putting it away. This “lockout” position prevents accidental activation in storage and relieves constant pressure on the O-rings, extending their life.
Store the light in a dry, ventilated location out of direct sun. UV degrades both rubber seals and plastic lenses over time. If the light lives in a ditch bag or console locker, add a small desiccant pack nearby and check it each season.
Check: The light is clean, dry, stored with the cap loosened, and you can find it in the dark in under ten seconds — practice this once.
Step 7: Re-lubricate and retest on a schedule
Repeat the seal inspection, cleaning, and lubrication from the earlier steps at the start of each boating season — and any time the light has been submerged in salt water or unused for more than three months. Rerun the submersion test afterward. Replace the O-rings every one to two years regardless of appearance, or immediately after any flooding event, and swap batteries on a calendar schedule rather than waiting for them to die.
Write the schedule down — a note in your boat’s maintenance log or a recurring phone reminder works — so the retest actually happens.
Tip: Buy a two-pack of replacement O-rings when you buy the light and tape them inside your boat’s spares kit. Seals are cheap; a flooded light on a dark night is not.
Check: You have a written or habitual schedule, fresh grease on the seals, and a passing water test at the start of each season.
Common Mistakes to Avoid
- Using petroleum-based grease or spray lubricants on the seals — Use only silicone-based O-ring grease, sold at any dive shop or marine supplier. Check the label before applying — if it says petroleum, petroleum distillate, or lithium, keep it away from the seals.
- Overtightening the head or tail cap — Tighten until the cap stops with firm hand pressure, then stop. The seal comes from the O-ring, not from thread force. If you find yourself using two hands or gripping the body in a vise, you are overtightening.
- Trusting a “water-resistant” or IPX4-rated light around salt water — Read the rating before buying. IPX4 means splash resistance only. Require IPX7 minimum for deck use and IPX8 with a stated depth rating for anything that goes in the water.
- Storing the light wet with the caps tightened — Rinse, dry, and loosen the tail cap a quarter turn before storage. Trapped moisture in a sealed tube causes exactly the internal corrosion and fogging you are trying to avoid.
Troubleshooting
Problem: The light passed the submersion test but now fogs under the lens
Solution: Fogging is usually humid air trapped inside, not a leak. Open the light, remove the batteries, and let all parts air-dry in a warm room for 24 hours with a desiccant pack nearby. Reassemble and retest. If fogging returns after submersion along with droplets in the battery tube, the seal has failed — replace the O-rings and retest.
Problem: Water got inside despite intact-looking O-rings
Solution: Flood the light in fresh water is step one: open it, remove batteries, rinse all internal parts in fresh water, then in isopropyl alcohol, and dry for 48 hours. Then find the cause: check for a hair or grit line on the O-ring seat, a ring that has taken a permanent set and stays flat, or threads that were cross-threaded. Replace the rings, lubricate generously-but-thinly, and rerun the submersion test before trusting the light again.
Problem: The light flickers or dims even with fresh batteries
Solution: Clean both battery terminal faces and the contact springs inside the head and tail with an alcohol-dampened cotton swab. Check for early corrosion — a green or white powder on terminals — and scrub it off with the swab. If the light uses a removable plastic insulating disc under the tail spring, confirm it is reinstalled correctly.
Problem: The switch is hard to press or sticks after salt exposure
Solution: Rinse the switch area in fresh water and work the switch through twenty presses while rinsing. Dry thoroughly. If it still sticks, apply a trace of silicone grease to the exposed edge of the switch boot. Never disassemble the switch head yourself on a sealed dive light — that breaks the factory seal and usually voids the depth rating.
What Success Looks Like
You have succeeded when all of the following are true: the light carries an IP rating appropriate to your use (IPX7 for deck, IPX8 with depth rating for submersion); the O-rings are clean, lubricated with silicone grease, and free of cracks or flat spots; the light cycles through every mode with a steady beam; it survives a 15-minute fresh-water submersion with switch cycling and comes out completely dry inside; and it is stored clean, dry, and with the tail cap loosened. A light that meets these checks will tolerate rain, spray, waves, and a drop overboard — which is the standard a marine light has to meet.
Next Steps
Add the flashlight to your boat’s pre-departure checklist: confirm it powers on and hold a brief beam check before each trip, since a dead battery is a more common failure than a leak. Mount or stow the light in a fixed, reachable location — a console bracket, ditch bag, or life jacket tether — and practice retrieving it in the dark once so the location is muscle memory. Buy spare O-rings and a spare set of batteries, and store them with your other boat spares. If the light floods in salt water and internal corrosion is visible after cleaning, retire it and replace it; a repaired corrosion-damaged light is not one to trust offshore. For night passages, consider adding a second, independently stored light as redundancy, following the same selection and testing steps in this guide.
Frequently Asked Questions
Is IPX7 enough for use on a boat?
Yes, for deck work, rain, spray, and brief dunking — IPX7 means submersion to 1 meter for 30 minutes. Choose IPX8 with a stated depth rating if the light will be deliberately submerged, used for diving, or relied on for recovering items overboard.
How often should I replace the O-rings?
Every one to two years with regular use, and immediately after any flooding event or if you see cracks, nicks, or a flattened profile during inspection. O-rings cost a few dollars and take minutes to replace; treat them as consumables.
Can I use the flashlight for scuba diving if it is rated IPX8?
Only if the manufacturer explicitly states a diving depth rating in meters or feet. IPX8 is a generic standard tested at a depth the manufacturer chooses, which may be only 2 meters. Dedicated dive lights are rated to specific depths and built to handle pressure cycling.
Should I store the flashlight with batteries installed?
Remove alkaline batteries before long storage — leaking alkalines destroy contacts and are the most common storage failure. Rechargeable lithium-ion cells can stay installed with the tail cap loosened for lockout, but check their charge every few months.
My light got dunked in salt water. What should I do right now?
Rinse the exterior in fresh water immediately, then open the light, remove the batteries, and rinse the interior parts in fresh water followed by isopropyl alcohol. Dry for 48 hours, inspect for corrosion, replace the O-rings, and rerun the submersion test before returning it to service.
NFL season / tailgating Picks
team gear
As an affiliate, we earn on qualifying purchases.