
To prevent haze when polishing gelcoat, follow the precise order: start with thorough surface cleaning and sanding with fine-grit paper to remove oxidation and imperfections. Then, use a medium-cut compound to eliminate dullness, followed by a finer polish to enhance clarity and gloss. Finish with a high-quality gloss enhancer to seal and protect the surface. Sticking to this sequence helps achieve a mirror-like finish free of haze, and if you continue exploring, you’ll discover how to perfect each step for stellar results.
Key Takeaways
- Properly clean and sand the gelcoat to remove contaminants, oxidation, and surface imperfections before polishing.
- Use the correct sequence: medium-cut compound, fine polish, then a gloss enhancer for optimal results.
- Select compatible, high-quality polishing compounds and tools suited for gelcoat to prevent haze.
- Maintain a clean, dust-free environment and keep the polisher moving to avoid overheating and uneven finishes.
- Follow expert techniques like consistent pressure and proper surface prep to achieve a mirror-like, haze-free shine.
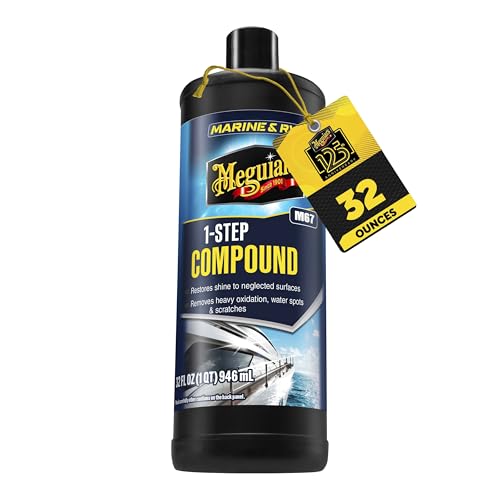
Meguiar’s Marine/RV One Step Boat Compound, Oxidation Remover, Boat Water Spot Remover, Also Removes Stains and Scratches, Restores Color and Shine to Fiberglass Gel Coat Finishes, 32 Oz
- High-Gloss Cleaning: Cleans fiberglass and gel coat surfaces
- Restores and Removes Imperfections: Eliminates oxidation, scratches, stains, water spots
- Enhances Shine and Luster: Provides a glossy, brilliant finish
As an affiliate, we earn on qualifying purchases.
As an affiliate, we earn on qualifying purchases.
What Causes Haze in Gelcoat and How to Prevent It
Haze in gelcoat occurs when tiny particles or oxidation form a dull, cloudy film on the surface, diminishing its shine and clarity. UV degradation accelerates this process by breaking down the gelcoat’s protective layer, leading to a loss of gloss and increased susceptibility to haze. Contamination buildup from dirt, oil, and other pollutants also contributes, settling into microscopic pores and creating a cloudy appearance. Over time, exposure to sunlight and environmental contaminants causes the gelcoat’s surface to deteriorate, making haze more likely. To prevent this, regularly wash your boat to remove contaminants and apply UV protectants to shield the gelcoat from harmful rays. Proper maintenance minimizes the risk of haze, keeping your gelcoat looking clear and shiny. Additionally, using appropriate indoor air quality gear can help reduce airborne pollutants that might settle on surfaces and contribute to haze formation. Maintaining a clean environment and protective coatings can further extend the clarity and longevity of your gelcoat. Employing preventive measures such as making use of quality waxes and sealants can provide an extra layer of defense against haze development. Regularly inspecting and addressing minor damage promptly can also prevent the formation of haze from microcracks and surface deterioration. Incorporating air filtration systems can further reduce the presence of airborne particles that may settle on the gelcoat surface and promote long-term clarity.

Meguiar's M4965 Marine/RV Fiberglass Restoration System, 3-Piece Marine Fiberglass Repair Kit Featuring Oxidation Remover for Boat Care Plus Boat Polish and Wax
- Restores Boat's Appearance: Revitalizes fiberglass and gel coat
- Removes Stains and Scratches: Eliminates oxidation stains and scratches
- Provides Brilliant Shine: Delivers high gloss and luster
As an affiliate, we earn on qualifying purchases.
As an affiliate, we earn on qualifying purchases.
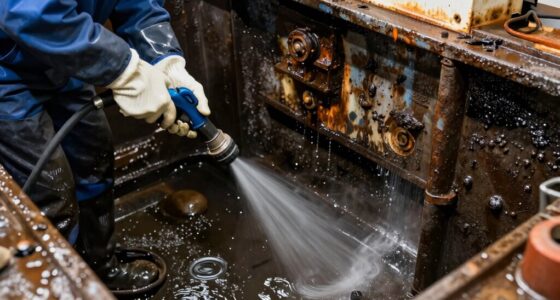
Preparing Your Boat Surface for Polishing
Before you start polishing, it’s essential to thoroughly clean and prepare the boat’s surface. Proper surface cleaning guarantees you remove dirt, grime, and oxidation that can hinder the polishing process. Skipping this step may cause scratches or haze. Focus on a complete boat maintenance routine to create a clean, smooth surface. Use appropriate cleaning agents and tools to eliminate contaminants. To understand the significance, consider this table:
| Step | Purpose | Result |
|---|---|---|
| Wash | Remove dirt and salts | Clean surface ready for prep |
| Dry | Prevent water spots | Better adhesion of polish |
| Inspect | Identify damage or roughness | Targeted repairs |
| Sand | Smooth surface imperfections | Prep for polishing |
| Mask | Protect surrounding areas | Prevent accidental damage |
Additionally, understanding surface preparation techniques can significantly improve your polishing results. Properly preparing the surface also helps prevent haze formation after polishing. Incorporating proper surface cleaning techniques ensures you create a professional finish and extends the longevity of your boat’s appearance. Engaging in thorough surface assessment ensures you address all issues before polishing, leading to a more consistent and durable shine.

Meguiar's M4516 Marine/RV Polish & Gloss Enhancer -16 Oz Bottle
- Marine and RV Polish: Enhances boats and RVs with a brilliant shine
- Optimal Gloss Formulation: Contains nourishing polishing oils for a stunning finish
- Ideal Polishing Step: Perfect after washing to enhance appearance
As an affiliate, we earn on qualifying purchases.
As an affiliate, we earn on qualifying purchases.
Choosing the Best Polishing Products and Tools

Choosing the right polishing products and tools is essential to achieving a smooth, glossy finish on your boat. Start with proper abrasive selection; use finer compounds for finishing to prevent haze and scratches. Coarser abrasives remove imperfections but should be used cautiously. Tool ergonomics also matter—select ergonomic buffers or polishers that reduce fatigue and give you better control. A well-designed tool minimizes vibration and allows for consistent pressure, preventing uneven results. Consider the size and speed of the polisher to match your workspace and gelcoat condition. Using the correct combination of abrasives and ergonomic tools ensures you work efficiently, avoid unnecessary damage, and achieve a professional-quality shine. Proper product and tool choices set the foundation for a flawless gelcoat finish. Additionally, understanding the evolving language of the internet can help you access better tutorials and reviews to improve your polishing techniques. Being aware of gelcoat compatibility ensures that the products you choose will not damage or discolor your boat’s surface over time. Furthermore, selecting products with appropriate abrasiveness will help prevent unnecessary wear on your gelcoat while achieving optimal results. Researching product reviews and brand reputation can also guide you toward more reliable and effective polishing solutions. Paying attention to body jewelry measurements and materials can help you choose the right products that are gentle yet effective on delicate surfaces.
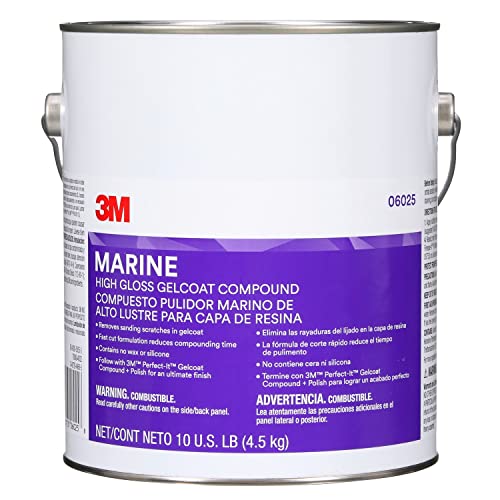
3M Marine High Gloss Gelcoat Compound, 06025, 10 lb, White
- Removes sanding scratches: Eliminates sanding marks and scratches
- Removes oxidation and stains: Effectively removes oxidation and stains
- Creates high gloss shine: Produces a glossy, shiny finish
As an affiliate, we earn on qualifying purchases.
As an affiliate, we earn on qualifying purchases.
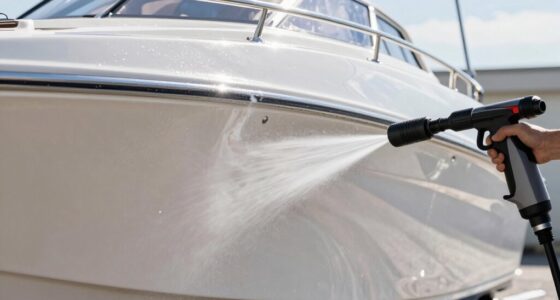
The Right Gelcoat Polishing Order to Avoid Haze

To achieve a clear, glossy gelcoat finish without haze, it’s essential to follow the correct polishing order. Proper sequencing ensures effective color correction and minimizes haze caused by environmental factors. First, start with a medium-cut compound to remove oxidation and minor imperfections. Second, move to a finer polish for smoothness and clarity, enhancing the color. Lastly, apply a high-quality gloss enhancer to seal in the finish and prevent environmental damage.
Remember, environmental factors like humidity and dust can affect your results, so work in a controlled setting. Keep these steps in mind:
- Remove oxidation and imperfections with a suitable compound
- Refine the surface with a finer polish for a smooth, uniform finish
- Seal and protect with a gloss enhancer for a haze-free shine
- Consider the environmental conditions to ensure optimal results and prevent haze formation
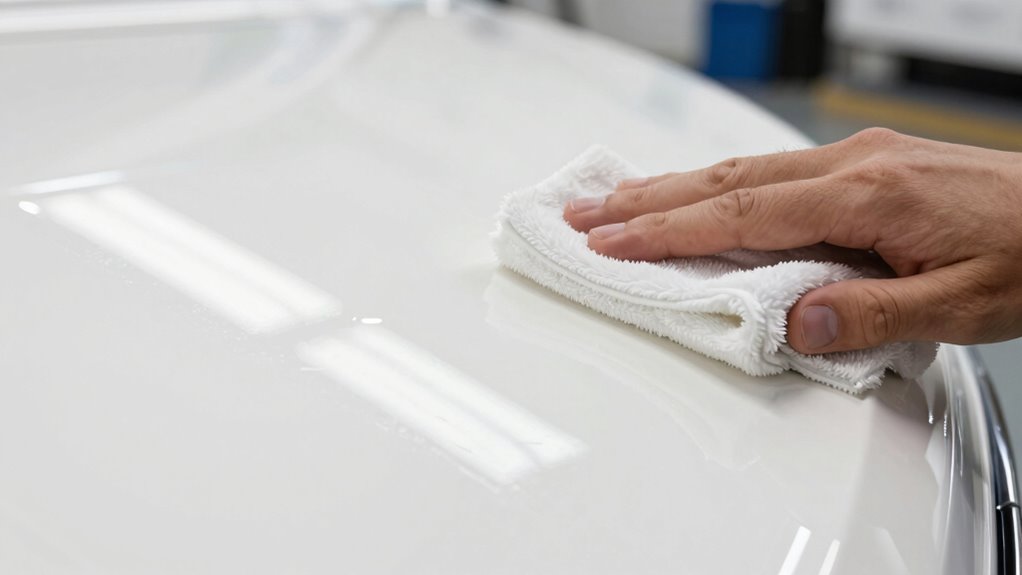
Expert Tips for a Smooth, High-Gloss Finish
Achieving a smooth, high-gloss finish starts with proper surface preparation and careful gelcoat application. Using the right techniques guarantees your surface is even and free of imperfections before polishing. Proper surface preparation is crucial to minimize the need for extensive correction later. Mastering ideal polishing methods will bring out that flawless, mirror-like shine you’re aiming for. Additionally, selecting halal-friendly polishing compounds and tools ensures your project aligns with your ethical preferences while maintaining quality. Understanding AI-driven innovations in material processing can also help optimize your finishing techniques for better results. Moreover, incorporating proper workspace setup can significantly improve your comfort and consistency, leading to a superior finish. Incorporating anti-fatigue mats and ergonomic standing desk gear can further enhance your workspace comfort, reducing fatigue and improving your overall finish quality.
Surface Preparation Techniques
Preparing your gelcoat surface properly is essential for a flawless, high-gloss finish. It guarantees the paint adheres correctly, achieving vibrant color matching and environmental safety. To get started:
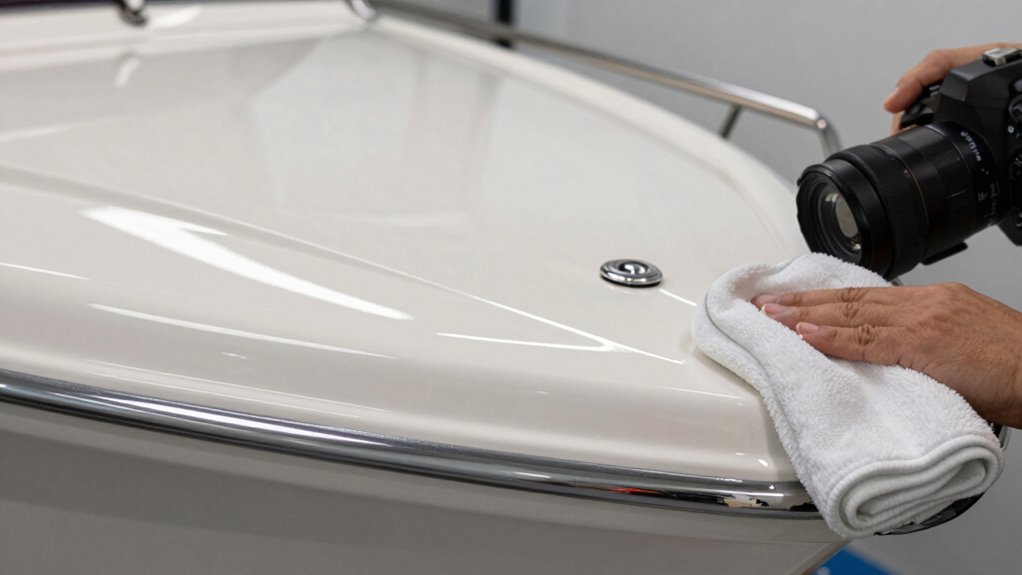
- Clean thoroughly using a gentle, eco-friendly cleaner to remove dirt, grease, and contaminants, preventing haze. This initial cleaning step is crucial because surface contaminants can interfere with the adhesion process and cause surface imperfections.
- Sand with fine-grit paper to smooth imperfections, revealing a fresh surface ready for polishing.
- Remove dust completely with a tack cloth, ensuring no debris interferes with the finish and that your work remains environmentally safe.
- Incorporate surface preparation techniques to motivate consistent maintenance and proper surface care, promoting long-lasting results. Proper surface preparation, including contamination removal, is vital for achieving a high-quality, durable finish. Additionally, maintaining a dust-free environment enhances finish quality, preventing micro-scratches.
- Ensure adequate airflow around the work area to prevent dust settling on the surface during the finishing process, which can compromise the gloss and clarity.
These steps create a pristine foundation, reducing surface defects and promoting a sleek, glossy result. Proper surface prep isn’t just about aesthetics—it’s about ensuring safety and longevity while delivering a stunning, mirror-like shine.
Proper Gelcoat Application
Ever wondered how to guarantee your gelcoat application results in a smooth, high-gloss finish? The key is proper application technique. Start by applying the gelcoat evenly in thin coats, allowing each layer to gelcoat curing fully before adding the next. This prevents runs and uneven texture. Once the final coat cures completely, avoid rushing into finish sanding; give it ample time to cure thoroughly. Finish sanding carefully, using progressively finer grits, to remove imperfections and prepare the surface for polishing. Proper gelcoat curing ensures the coating hardens correctly, reducing haze and defects later. Take your time during application and curing, as this foundation affects the final look. Using correct curing conditions such as optimal temperature and humidity can significantly improve the finish quality. With precision and patience, you’ll achieve a flawless, high-gloss finish that stands out.
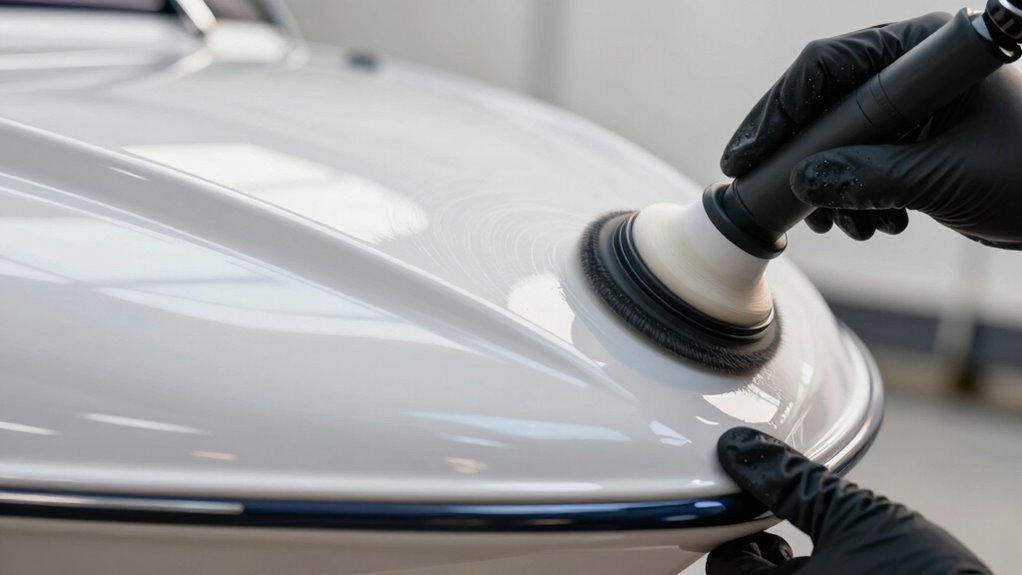
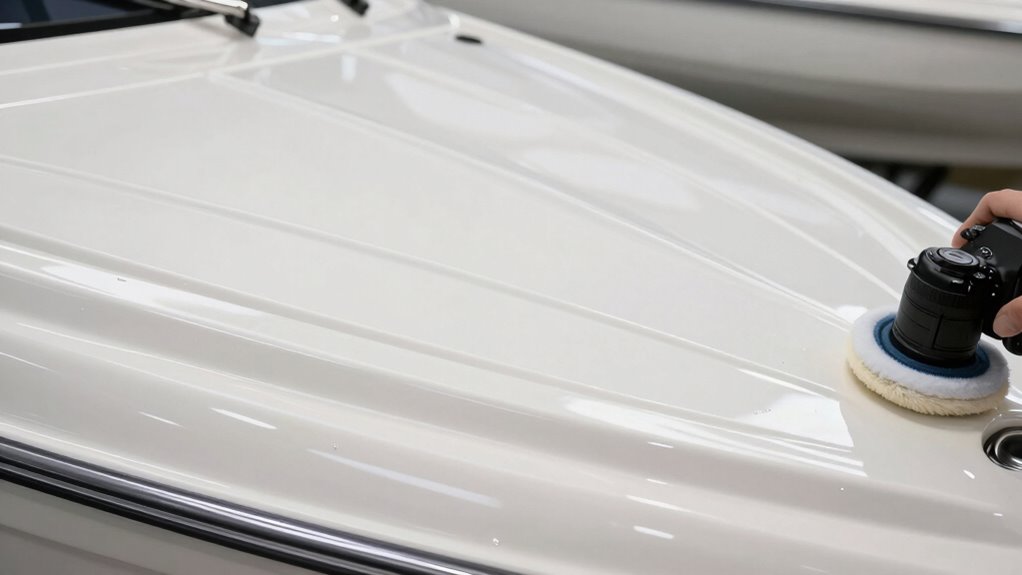
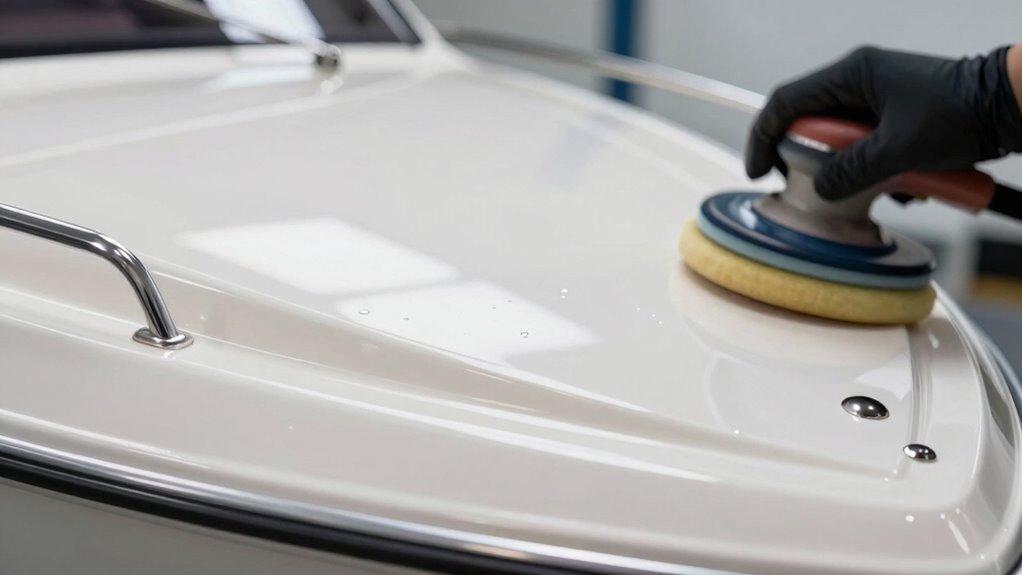
Optimal Polishing Methods
To get a mirror-like, high-gloss finish on your gelcoat, choosing the right polishing methods is essential. Understanding your gelcoat composition helps you select the appropriate polishing machinery and compounds. The key is to work methodically to avoid haze and swirl marks.
Here are three expert tips:
- Use a dual-action polisher with variable speed settings to control heat and pressure, protecting the gelcoat’s integrity.
- Start with a medium-grit polishing compound to smooth out imperfections, then finish with a finer polish for that glossy shine.
- Always keep the polishing machinery moving to prevent uneven spots and overheating, which can damage the gelcoat.
- Consulting lubricant specifications can help ensure that your polishing compounds and equipment are compatible and optimized for your gelcoat type. Additionally, being aware of gelcoat compatibility is crucial to prevent undesirable effects during polishing.
Mastering these techniques guarantees a flawless, high-gloss surface that lasts.
Common Mistakes That Lead to Haze or Damage
One of the most common mistakes that can cause haze or damage when polishing gelcoat is using the wrong abrasive or applying too much pressure. This can lead to unwanted chemical reactions, damaging the surface or creating a hazy film. Environmental factors like humidity and dust can also interfere, compromising your finish. To avoid these issues, choose the correct abrasive for your gelcoat and use gentle, even pressure. Be mindful of the environment and work in a clean, controlled area. Here’s a quick comparison:
| Mistake | Result |
|---|---|
| Using harsh abrasives | Surface scratches, haze |
| Excessive pressure | Gelcoat damage, haze |
| Ignoring environmental factors | Imperfections, chemical reactions |
| Rushing the process | Incomplete polishing |
| Skipping surface prep | Poor finish, damage |
Frequently Asked Questions
How Often Should I Re-Polish My Gelcoat to Prevent Haze?
You should re-polish your gelcoat every 1 to 2 years to prevent haze. UV exposure and salt corrosion accelerate the deterioration, making regular maintenance essential. Keep an eye on the gelcoat’s appearance; if you notice dullness or haze forming, it’s time to re-polish. Regularly applying protective wax or sealant can also help shield your gelcoat from UV rays and salt, extending the time between re-polishing.
Can Environmental Factors Affect the Gelcoat Polishing Process?
Yes, environmental factors can affect your gelcoat polishing process. UV degradation from sun exposure weakens the gelcoat, making it prone to haze and damage, so regular polishing helps mitigate this. Salt corrosion from seawater accelerates deterioration and can cause haze or roughness. Protect your gelcoat by rinsing with freshwater after saltwater exposure and applying suitable protective wax or polish to maintain a smooth, clear surface.
What Are Signs That My Gelcoat Is Becoming Hazy or Damaged?
You notice your gelcoat losing its shine, with signs like color fading and increased surface roughness. These are warning signals that haze is forming or damage is occurring beneath the surface. If you see dullness or a chalky appearance, it’s time to act; ignoring these signs can worsen the haziness. Stay vigilant—early intervention helps restore your gelcoat’s clarity and prevents long-term damage.
Is It Necessary to Use a Buffer or Machine Polisher?
You don’t always need a buffer or machine polisher, but they can make your gelcoat shine brighter and remove stubborn haze more efficiently. Buffer techniques, including machine polishing, help achieve a smooth, glossy finish quickly and evenly. If your gelcoat has light hazing or scratches, hand polishing might suffice. However, for deeper damage or larger surfaces, using a buffer or machine polisher is highly recommended for best results.
How Long Does a High-Gloss Gelcoat Finish Typically Last?
A high-gloss gelcoat finish typically lasts 2-3 years if you’re lucky, especially without proper UV protection. Surface contaminants, like dirt and salt, sneak in and dull that shine faster than you’d hope. To make it last, regularly wash, apply UV protectant, and avoid harsh cleaners. Think of it as giving your boat a spa day—only then can you enjoy that mirror-like shine without it fading into obscurity.
Conclusion
Think of polishing your gelcoat like painting a masterpiece—you need the right order to avoid smudges and haze. I once watched a boat owner carefully follow the perfect polishing sequence, and the glossy finish looked like glass. When you prevent haze by choosing the correct products and steps, your boat shines brighter and lasts longer. Stick to the proven order, and you’ll transform your surface into a stunning, mirror-like finish that turns heads every time.