Incorrectly mounting or orienting your depth sounder can cause false signals and inaccurate data. Make sure the transducer is secure, level, and angled properly, typically between 0° and 10°. Avoid mounting it in turbulent areas, and keep the face clean for clear signals. Poor wiring or interference from engines and electronics can also distort the data. To guarantee consistent, reliable results, understanding proper installation practices will make all the difference—keep reading to learn more.
Key Takeaways
- Ensure the transducer is mounted level, stable, and at the correct angle (0°-10°) for accurate readings.
- Use high-quality, waterproof cables and secure connections to prevent interference and signal loss.
- Mount the transducer fully submerged, away from turbulence, spray, and electromagnetic sources.
- Regularly clean the transducer face and check hardware for looseness or damage.
- Calibrate the system according to manufacturer instructions and verify performance in known-depth areas.

Saillong Transducer Mounting Plate Kit, 25mm Transducer Mount with Adhesive, Adhesive Mounting with Scouring Pads Cleaning Wipes, No Drill Sensor Mount(Black,4.3 x 3.5 Inch)
Complete Kit for Easy Installation: Our screwless transducer mounting plate kit includes all necessary accessories for a seamless…
As an affiliate, we earn on qualifying purchases.
As an affiliate, we earn on qualifying purchases.
Why Proper Depth Sounder Installation Matters

Proper installation of your depth sounder is essential because it directly impacts the accuracy and reliability of the readings. The effectiveness of your depth sensor technology depends on how well it’s installed, ensuring it functions correctly across different boat hull designs. A poorly mounted transducer can result in inaccurate depth measurements, which can be dangerous or misleading. Understanding your boat hull design helps you choose the right mounting position, reducing interference from turbulence or air bubbles. Proper installation minimizes signal noise and prevents false readings, giving you consistent, trustworthy data. When you pay attention to these details, you maximize your depth sounder’s performance, making navigation safer and more efficient on the water. Additionally, being aware of cabling failures and troubleshooting can help you identify potential problems before they affect your readings.

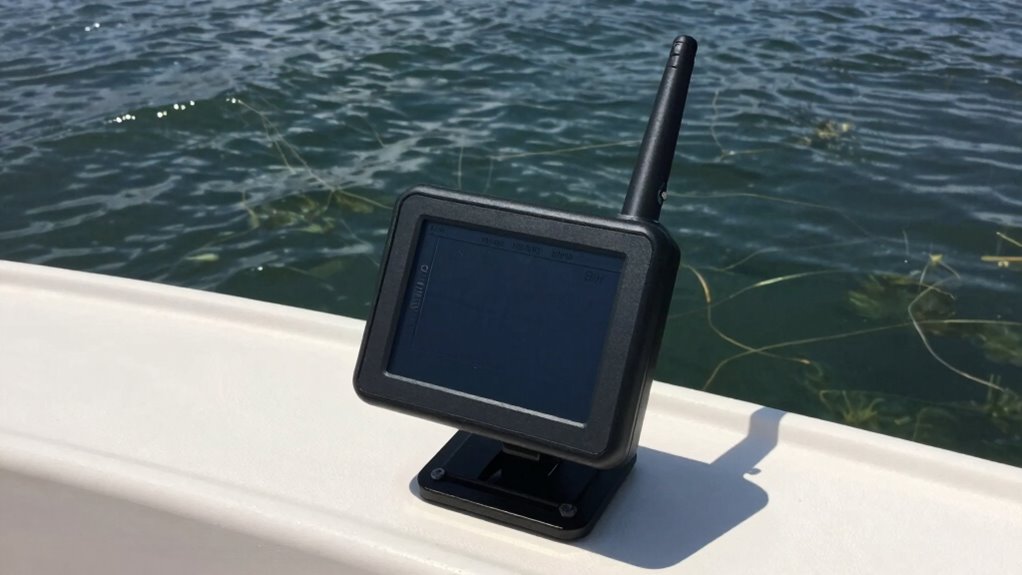
Portable Wired Fish Finder Ice Kayak Fishing Gear Water Depth Finder Handheld Fishfinder with Water Resistant Bag and Storage Case
Shows you what is in the water: water depth, approximate fish location (suits for all sorts of fish),…
As an affiliate, we earn on qualifying purchases.
As an affiliate, we earn on qualifying purchases.
How to Choose the Best Transducer Placement
To get clear, accurate readings, you need to position your transducer correctly. Make certain it’s placed where signals won’t be blocked or reflected by other objects. Proper placement helps you avoid interference and ensures reliable depth data. Additionally, avoiding air bubbles around the transducer can significantly improve measurement accuracy. Ensuring the transducer is mounted on a stable, properly secured surface helps prevent movement that could distort readings. Consistent transducer placement is essential for maintaining accurate and repeatable measurements over time. Using the correct installation techniques will further improve your depth readings and device longevity. Regularly inspecting the mounting position can help identify potential issues before they affect your readings.
Optimal Transducer Positioning
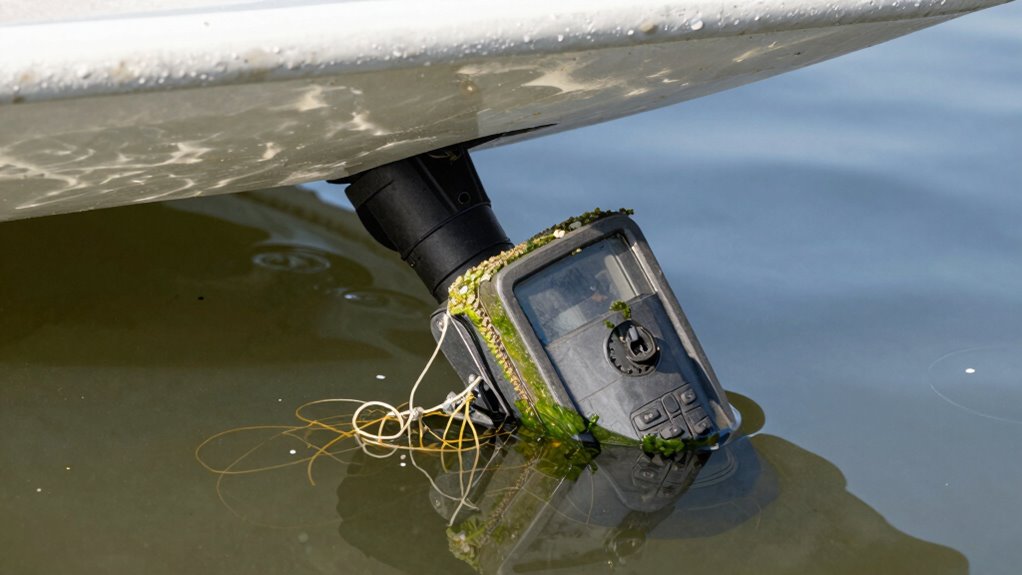
Choosing the right spot for your depth sounder transducer is essential for accurate readings and reliable performance. You should consider the transducer material, as some materials resist corrosion better and provide clearer signals over time. When positioning, ensure the transducer is mounted flat against the hull or transom, avoiding areas with turbulence or turbulent water flow. Different depth sounder brands may have specific mounting recommendations—review these to optimize performance. Place the transducer below the waterline but away from areas where spray or air bubbles could interfere with signals. Keep it clear of obstructions like keels or rough patches that can distort readings. Proper positioning minimizes noise and enhances signal clarity, ensuring you get precise depth measurements during your trips. Additionally, understanding transducer placement techniques can significantly improve your overall sonar accuracy and longevity, especially when considering optimal mounting locations for different vessel types. Carefully selecting the installation angle can further enhance the clarity and reliability of your depth sounder readings. To achieve optimal results, consider hydrodynamic flow principles to reduce turbulence around the transducer area. Proper maintenance and inspection also play a vital role in maintaining consistent and accurate readings over time.
Avoiding Signal Interference
Signal interference can markedly affect the accuracy of your depth sounder readings, so it’s crucial to select the best transducer placement. To minimize signal noise and electronic interference, avoid mounting the transducer near power cables, electronic devices, or metal structures that can create interference. Position it away from engines, transom-mounted electronics, and other sources of electromagnetic signals. Keep the transducer submerged deep enough to prevent air bubbles and turbulence from disrupting the signal. Proper placement ensures clearer readings and reduces false echoes. Remember, even small adjustments can greatly improve performance. By paying attention to potential sources of interference and choosing a spot with minimal electronic noise, you’ll get more reliable depth readings and a better overall boating experience. Additionally, proper installation techniques can further enhance signal clarity and accuracy, and consulting manufacturer guidelines can help optimize placement for your specific setup. Being mindful of electromagnetic interference sources is essential to maintaining consistent and accurate readings during your outings.
Boat Erasers 3-Pack by Better Boat – Cleaning Sponge for Scuff Marks & Grime, Marine Accessories & Gifts, Safe on Fiberglass Vinyl Gelcoat Deck Hull
THE ORIGINAL BOAT ERASER: This is the one that started it all. Dozens of copycats have appeared since,…
As an affiliate, we earn on qualifying purchases.
As an affiliate, we earn on qualifying purchases.
Mounting and Orienting Your Transducer Correctly
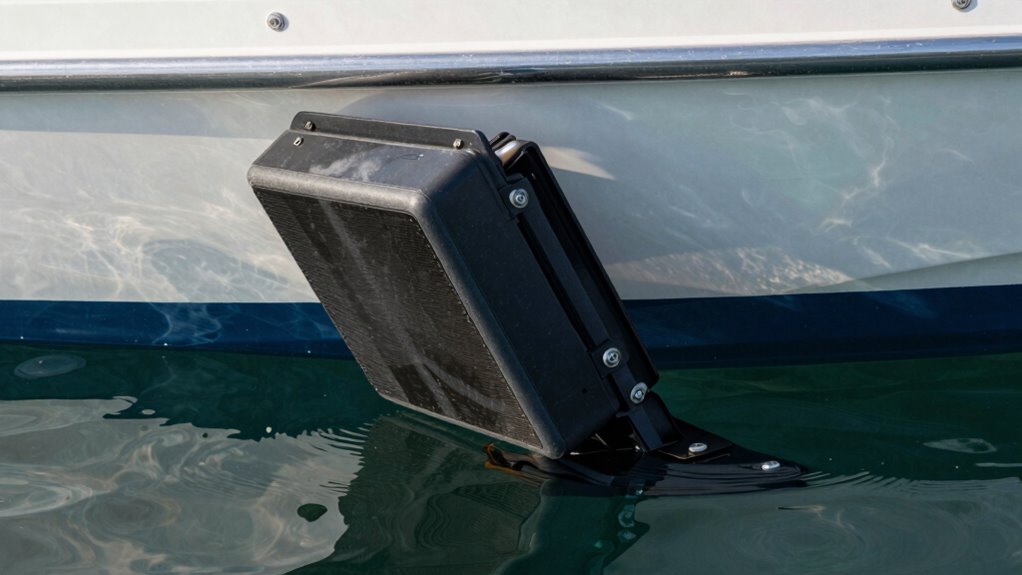
To get accurate readings, you need to mount and orient your transducer properly. Focus on placing it in the right spot, setting the correct angle, and ensuring it stays stable during operation. These steps are essential for reliable depth detection and clear sonar images. Proper transducer placement also helps prevent common installation mistakes that can distort readings. Additionally, selecting the appropriate mounting hardware ensures the transducer remains secure and functions optimally.
Proper Transducer Placement
Have you ever wondered why your depth sounder readings are inconsistent? Proper transducer placement is key to accurate data. If your transducer isn’t mounted correctly, the fish finder’s sonar signal can bounce erratically, giving false readings or blank screens. To optimize performance:
- Mount the transducer flat against the hull, ensuring it’s fully submerged and stable.
- Keep the transducer’s face clean and free of debris or air bubbles that can distort the sonar signal.
- Avoid mounting it near turbulence, such as propellers or intake areas, which can cause erratic signals.
Positioning the transducer correctly ensures a clear, reliable sonar signal, providing you with precise depth and fish location data. Proper placement minimizes noise and maximizes the fish finder’s accuracy, helping you navigate and fish more effectively.
Correct Mounting Angle
Proper mounting angle guarantees your transducer provides accurate readings by maintaining ideal sonar orientation. To achieve this, focus on adjusting the transducer tilt so it’s parallel to the boat’s bottom when in the water. An incorrect mounting angle can cause distorted images or false readings, making it harder to interpret depth and structures. Use a level or angle guide to ensure the transducer is tilted correctly, typically between 0° and 10°, depending on your boat and transducer type. Keep in mind that too much tilt can create poor signal returns, while too little may result in dead zones. Correct mounting angle is essential for optimal performance. Consistently checking and adjusting the mounting angle ensures your depth sounder performs perfectly and delivers reliable, precise readings. Additionally, understanding the impact of mounting angle on sonar performance can help prevent common installation errors and improve your overall fishing experience.
Ensuring Stable Position
How can you guarantee your transducer stays stable during operation? The key is proper mounting and orientation. Use effective anchoring techniques to prevent movement caused by wakes or waves. Secure the transducer firmly to avoid shifting that can distort readings. Proper cable management is equally important—tuck and fasten cables neatly to prevent tugging or accidental disconnections. Ensure the transducer is level and aligned with the boat’s hull for accurate readings. Regularly check the mounting and cables for looseness or wear. Additionally, using correct installation methods can significantly reduce the likelihood of errors caused by improper setup. By paying attention to these details, you reduce the risk of unstable readings and improve depth accuracy. Remember, a stable, well-mounted transducer is essential for reliable sonar performance and precise depth measurements.

Black – Standard Size 4.5" x 3.5" x 0.75" Stern Pad, Screwless Transducer Mounting Plate kit, Marine-Grade Transducer Mounting Board Hardware Kit(NOT for Large 3D Scan Transducers)
🛥️[Product Overview] Stern Pad, Screwless Transducer Mounting Plate kit, Marine-Grade Transducer Mounting Board Hardware Kit.
As an affiliate, we earn on qualifying purchases.
As an affiliate, we earn on qualifying purchases.
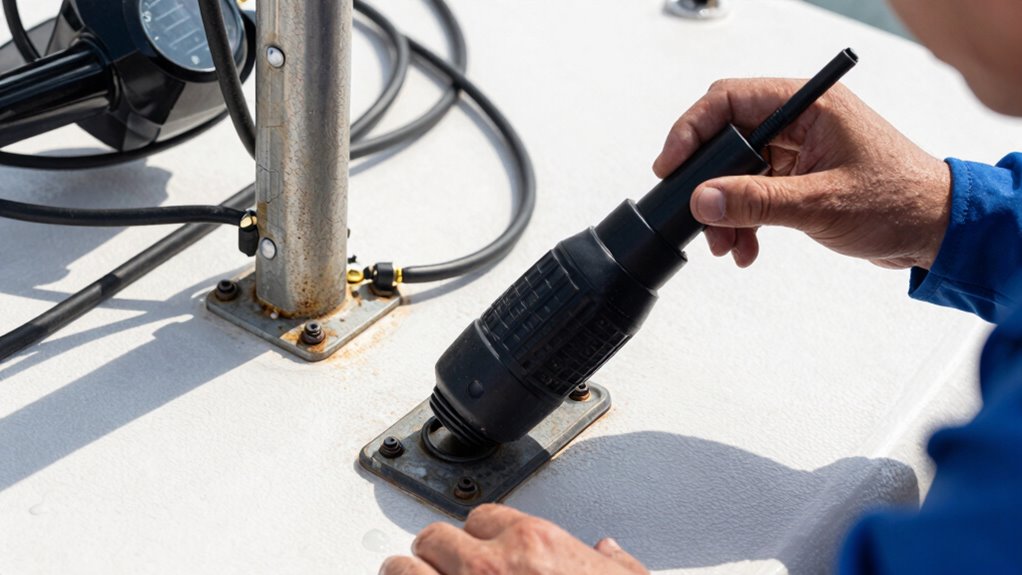
Wiring and Connecting Your Depth Sounder Properly
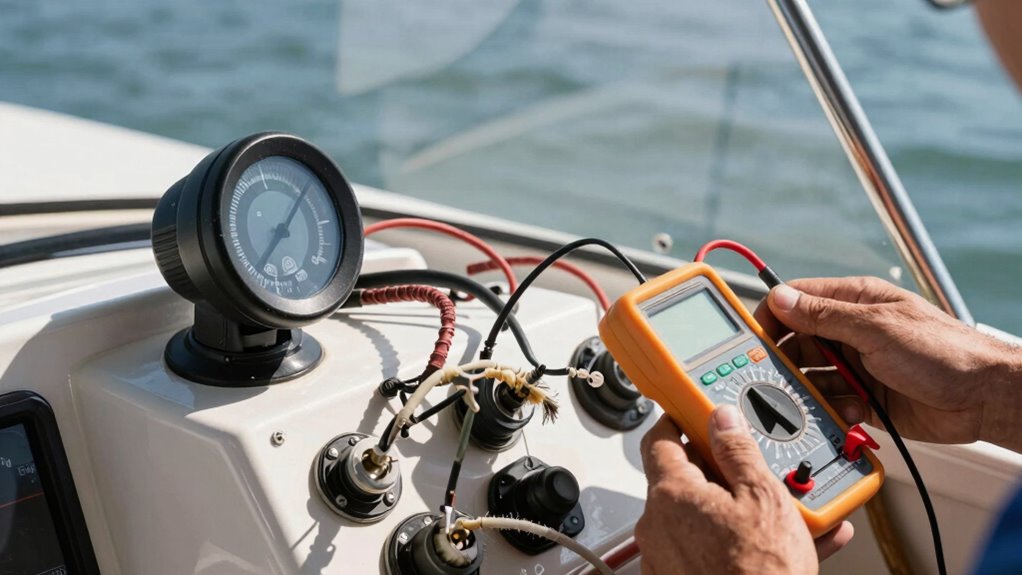
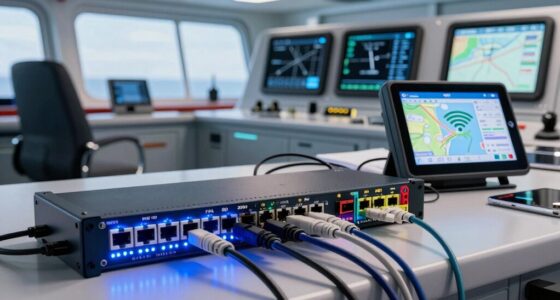
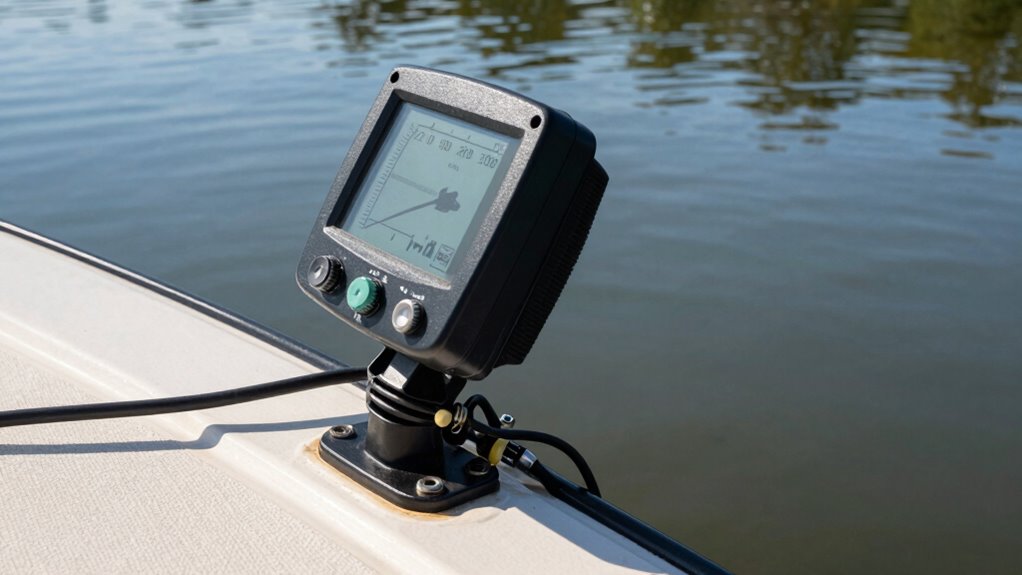
Ensuring your depth sounder is wired and connected correctly is essential for accurate readings and reliable operation. Start with high-quality cable that minimizes signal interference and resist corrosion. Poor cable quality can cause inconsistent data, so don’t cut corners here. Pay attention to connector types; use waterproof and compatible connectors to prevent moisture ingress and ensure secure connections. Properly route cables to avoid kinks, pinching, or exposure to heat and moving parts. Secure all connections tightly to prevent disconnections during operation. Double-check that wiring matches the manufacturer’s diagram, avoiding incorrect polarity or loose connections. Proper wiring and connections lay the foundation for accurate depth readings, so take your time to do it right and verify everything before powering up your depth sounder. Additionally, consider cable safety practices to prevent heat buildup and damage, especially in high-temperature environments. Always inspect electrical connections regularly to maintain optimal performance and prevent potential failures.
Calibrating and Testing Your Depth Sounder for Accuracy
Once you’ve wired and connected your depth sounder correctly, the next step is to calibrate and test it to confirm it provides accurate readings. Start with sensor calibration by following the manufacturer’s instructions to ensure the device measures depths precisely. Then, perform signal testing in a known depth area—such as a marina or dock—to verify your readings match the actual depth. Proper calibration and testing prevent errors caused by incorrect sensor setup or faulty signals.
- Check your sensor calibration against a reliable depth mark for accuracy.
- Use signal testing in a controlled environment to identify inconsistencies.
- Adjust settings as needed to fine-tune your depth sounder for the best performance.
Environmental Factors That Can Affect Depth Readings
Environmental factors can substantially impact the accuracy of your depth readings. Water temperature plays a vital role because it affects sound wave speed; colder water slows sound transmission, leading to potential depth measurement errors. Keep in mind that as water temperature varies, you may need to adjust your sounder settings or calibration. Seabed composition also influences readings—hard, rocky bottoms reflect sound waves differently than soft, muddy seabeds. Soft sediments tend to absorb or scatter sound pulses, causing inaccurate or inconsistent readings. These environmental conditions can cause your depth sounder to produce false readings or reduce its reliability. To guarantee accurate measurements, consider environmental factors when installing and operating your depth sounder, and always be aware of how changing water conditions and seabed types might affect your readings.
Tips for Maintaining and Verifying Accurate Depth Measurements
Regularly maintaining and verifying your depth sounder is essential for accurate readings. Proper depth sounder calibration guarantees your device provides reliable data, while consistent transducer maintenance prevents buildup and damage that can distort measurements. To keep everything in check:
- Perform routine calibration checks, especially after rough voyages or hardware updates.
- Clean the transducer regularly to remove debris or algae, ensuring clear signal transmission.
- Inspect wiring and connections for corrosion or damage, replacing parts as needed.
Frequently Asked Questions
Can Improper Installation Cause Permanent Damage to the Depth Sounder?
Yes, improper installation can cause permanent damage to your depth sounder. If you don’t position the transducer correctly, it may lead to inaccurate readings or damage over time. Poor wiring connections can also cause short circuits or electrical failures, harming the device permanently. Always make certain the transducer is properly positioned and wiring is secure to avoid costly repairs or replacements. Proper installation extends your depth sounder’s lifespan and guarantees accurate performance.
How Often Should I Recalibrate My Depth Sounder for Optimal Accuracy?
You should recalibrate your depth sounder regularly, ideally every few months, to maintain ideal accuracy. Calibration frequency depends on how often you use it and the signal stability you observe; if you notice inconsistent readings, it’s time to recalibrate. Keep an eye on signal stability, especially after hardware changes or rough conditions, and recalibrate promptly to ensure reliable depth measurements.
Are There Specific Boat Types That Require Different Transducer Placement Strategies?
Certain boat types do require different transducer placement strategies due to hull design. For example, planing hulls often need transducers mounted lower or on the keel for clearer readings, while deep-V hulls benefit from side or transom mounting. You should consider your boat’s hull shape and construction to determine ideal transducer placement, ensuring it’s free from turbulence and obstructions. Proper placement enhances accuracy and prevents false readings.
What Are Common Signs Indicating My Depth Readings Are Inaccurate?
If your depth readings seem off, check for calibration issues and sensor corrosion. Calibration problems can cause inaccurate data, so make sure your device is correctly set up and regularly tested. Sensor corrosion, often from saltwater, can impair signal transmission. Inspect your transducer for corrosion and clean it as needed. Also, verify the transducer’s placement, as improper positioning can lead to inconsistent readings. Regular maintenance helps keep your depth sounder accurate.
Does the Installation Environment Impact the Longevity of the Depth Sounder?
Yes, your installation environment impacts your depth sounder’s longevity. If you choose a harsh, corrosive setting or neglect proper corrosion prevention, the device can degrade quickly. make certain you install it in a sheltered area, avoid exposure to saltwater or chemicals, and use corrosion-resistant materials. Properly managing the environment helps protect your investment, prolongs the device’s lifespan, and keeps your readings accurate over time.
Conclusion
Did you know that improper depth sounder installation can lead to readings off by up to 20%? That’s a huge risk when steering or fishing. By choosing the right transducer placement, mounting it correctly, and maintaining your system, you guarantee accurate readings every time. Don’t let simple mistakes jeopardize your safety or spoil your trip. Take the time to install and care for your depth sounder properly—you’ll enjoy confident, precise depth information every outing.