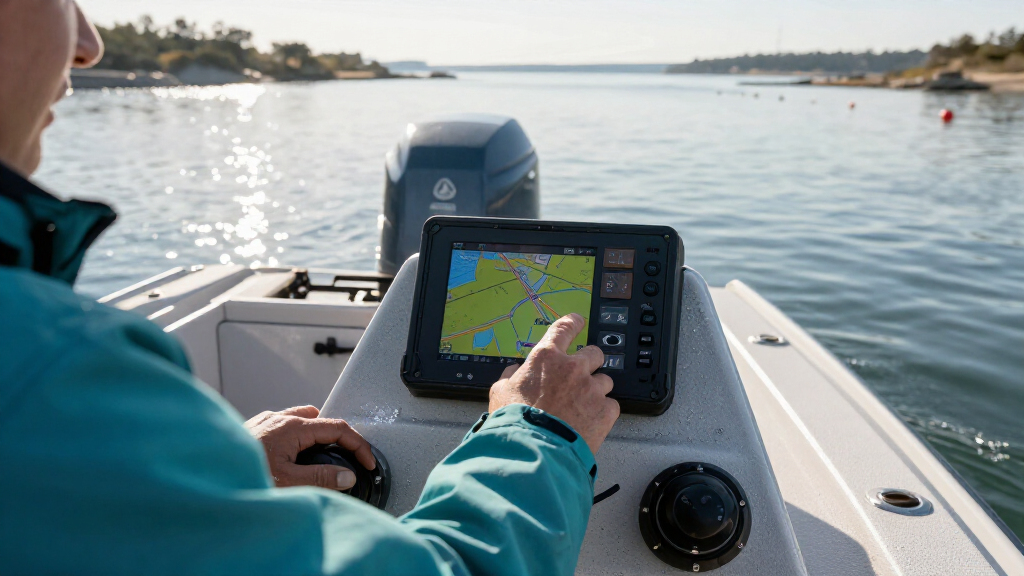
This guide shows recreational boaters how to prepare a marine GPS chartplotter for navigation: check its installation and settings, select appropriate charts, plan a route, and verify position and route information before departure. It is written for beginners who can operate basic boat electronics; no chartplotter experience is required. Allow 45-90 minutes to configure the unit and plan a route, with additional time for a dockside check and on-water practice.

Get sports gear delivered free with Prime
- Fast, free delivery on millions of items
- Prime Video, Amazon Music and more included
- Member-only deals all year

Simrad GO9 XSE Chartplotter and Fish Finder with Transducer, Radar Options and Preloaded C-MAP Discover Card
- ✔ Display: Multi-touch touchscreen
- ✔ GPS: Built-in 10 Hz receiver
- ✔ Transducer: 83/200 kHz HDI

Garmin ECHOMAP UHD2 93sv with GT56 Transducer, 9" Touchscreen Chartplotter, Garmin Navionics+ U.S. Inland
- ✔ Display: 9-inch touchscreen
- ✔ Transducer: GT56
- ✔ Sonar: Traditional, ClearVü, and SideVü

Garmin ECHOMAP UHD2 54CV Chartplotter/Fishfinder with US Coastal Maps and GT20-TM Transducer
- ✔ Display: 5-inch keyed display
- ✔ Transducer: GT20-TM
- ✔ Sonar: Garmin CHIRP traditional and ClearVü scanning
A chartplotter displays your vessel’s GPS position on an electronic chart and can help you follow a planned route. It does not replace a paper chart, lookout, depth awareness, weather checks, or sound seamanship. Use it as one source of navigation information, and follow local rules and the manufacturer’s instructions.
Difficulty: Beginner | Time: 45-90 minutes for setup and route planning; navigation time varies
What You’ll Need
Tools & Materials:
- Marine GPS chartplotter with its power supply and manual
- Compatible, current electronic chart card or authorized chart subscription
- Boat’s operating manual and GPS antenna information
- Paper chart or other independent navigation reference for the area
- Pen and notebook or a route-planning worksheet
- Access to a safe dock or other stationary location for setup checks
Knowledge:
- Basic familiarity with your boat’s helm and electrical system
- Ability to identify the intended departure point, destination, and hazards on a chart
- Understanding that GPS position and charted features can have errors or limitations
Check that the chart card or subscription covers your cruising area and is compatible with your chartplotter. Read the installation and operating instructions before changing wiring or advanced settings. If the unit needs electrical work, use a qualified marine technician. Do not rely on a chartplotter as your only means of navigation.
Simrad GO9 XSE Chartplotter and Fish Finder with Transducer, Radar Options and Preloaded C-MAP Discover Card
The Simrad GO9 XSE is our best overall pick because it combines the broadest stated use case in this group: chartplotting, CHIRP sonar, DownScan imaging, and a route toward compatible radar integration. Its preloaded C-MAP Discover coverage for the US and Canada is a practical advantage for boaters who travel across those regions and want usable chart coverage in the box. The built-in 10 Hz GPS, Wi-Fi, and NMEA 2000 also make it more suited to a connected helm than the smaller Garmin 54CV.The 83/200 kHz HDI transducer supports traditional sonar and DownScan, giving anglers useful bottom and structure information without making the chartplotter’s role secondary. Compared with the Garmin 93sv, the Simrad offers broader stated regional chart coverage and radar compatibility, while the Garmin provides SideVü through its supplied GT56 transducer. That makes the Garmin more compelling for anglers who specifically want side-looking sonar, but the Simrad is the more balanced navigation-and-expansion choice.There is an important US routing caveat: EasyRouting/AutoRouting is not available in the USA, so we should not buy it expecting that feature to plan routes there. Radar compatibility also means an expansion option, not that radar hardware is included. Its touchscreen may suit a clean, flexible helm, but buyers who strongly prefer dedicated physical keys should compare it with the keyed Garmin 54CV.
Pros:
- Preloaded C-MAP Discover charts cover the US and Canada.
- Includes CHIRP sonar and DownScan imaging with an 83/200 kHz HDI transducer.
- Wi-Fi and NMEA 2000 support connected-device and onboard-system integration.
- Compatible with specified Simrad Broadband 3G/4G and Halo pulse-compression radar systems.
Cons:
- EasyRouting/AutoRouting is unavailable in the USA.
- Radar is a compatibility option; the product description does not say radar hardware is included.
- Touchscreen controls may not suit buyers who prefer a keyed helm display.
Best for: Boaters seeking a larger multifunction chartplotter with US and Canadian charts, integrated sonar, NMEA 2000, and compatible radar expansion.
Not ideal for: US buyers who require automatic routing, or boaters who specifically want SideVü sonar and the supplied GT56 transducer.
Bottom line: We recommend the GO9 XSE when broad chart coverage and an expandable navigation-and-sonar system matter more than US automatic routing or SideVü.
“We recommend the GO9 XSE when broad chart coverage and an expandable navigation-and-sonar system matter more than US automatic routing or SideVü.”
Garmin ECHOMAP UHD2 93sv with GT56 Transducer, 9" Touchscreen Chartplotter, Garmin Navionics+ U.S. Inland
For anglers on US lakes, the Garmin ECHOMAP UHD2 93sv puts the most emphasis on seeing fish-holding structure. Its nine-inch touchscreen gives chart and sonar views room to breathe, and the included GT56 transducer supports traditional, ClearVü, and SideVü sonar. That third view distinguishes it from the Simrad GO9 XSE, whose supplied transducer offers CHIRP and DownScan but is not described as providing SideVü.The Navionics+ inland maps cover more than 18,000 US lakes, making this package a focused choice for freshwater boaters who fish a range of mapped waters. Wi-Fi enables waypoint and route sharing between chartplotters. Compared with the smaller Garmin 54CV, the 93sv offers a much roomier touchscreen and a broader stated sonar set; the 54CV, in turn, has keyed controls and coastal as well as inland chart support in its listing.Its main limitation is geographic scope: the included map data is US inland-focused, so coastal users or boaters outside that coverage should check chart availability and any additional requirements before choosing it. The larger display and GT56 make it a stronger fishing setup than a basic compact plotter, but they do not make it the best navigation package for every region. Buyers who need included US-and-Canada chart coverage or radar compatibility should look first at the Simrad.
Pros:
- Nine-inch touchscreen provides more room for charts and sonar than the 54CV.
- GT56 transducer supports traditional, ClearVü, and SideVü sonar.
- Navionics+ inland maps cover more than 18,000 US lakes.
- Wi-Fi supports waypoint and route sharing between compatible chartplotters.
Cons:
- Included mapping is limited to US inland waters; other regions may require additional chart purchases.
- The supplied information does not establish radar compatibility.
- Touchscreen operation will not suit every helm or control preference.
Best for: Freshwater anglers who want a large touchscreen and traditional, ClearVü, and SideVü sonar with extensive US inland lake mapping.
Not ideal for: Coastal boaters, buyers needing included Canadian or international maps, or those who prefer physical keys over a touchscreen.
Bottom line: Choose the 93sv when inland fishing and three complementary sonar views matter more than all-region chart coverage.
“Choose the 93sv when inland fishing and three complementary sonar views matter more than all-region chart coverage.”
Garmin ECHOMAP UHD2 54CV Chartplotter/Fishfinder with US Coastal Maps and GT20-TM Transducer
The Garmin ECHOMAP UHD2 54CV is the practical pick when the helm has limited space or a buyer prefers buttons to a touchscreen. Its five-inch keyed display is less expansive than the nine-inch Simrad and Garmin units, but physical controls can be useful when we want direct operation rather than relying entirely on touch. The included GT20-TM transducer combines Garmin CHIRP traditional sonar with ClearVü scanning, giving this compact unit meaningful fishing capability.Its chart support is presented as US coastal maps alongside LakeVü g3 inland maps and BlueChart g3 coastal charts, making it a more versatile regional fit than the inland-only package listed for the 93sv. It does not, however, match the Simrad’s stated US-and-Canada C-MAP Discover coverage or its NMEA 2000 and radar options. Nor does its supplied sonar package offer the 93sv’s SideVü view. The 54CV is therefore best understood as a smaller, simpler Garmin option—not a scaled-down substitute for every feature in the larger models.Garmin says compatible ECHOMAP UHD2 units can wirelessly share sonar, waypoints, and routes, but this is ecosystem-limited sharing, not a promise of universal compatibility. Some app functions also require a compatible smartphone and ActiveCaptain. Buyers who need a larger split view, broad fishing sonar coverage, or a more explicitly expandable navigation system should step up to the 93sv or consider the Simrad.
Pros:
- Five-inch keyed display offers physical controls in a compact format.
- GT20-TM provides Garmin CHIRP traditional and ClearVü scanning sonar.
- Chart support includes US coastal and inland options.
- Can share sonar, waypoints, and routes with compatible ECHOMAP UHD2 chartplotters.
Cons:
- The five-inch screen offers substantially less viewing area than the nine-inch models.
- Wireless sharing is limited to compatible ECHOMAP UHD2 chartplotters.
- Some app features require a compatible smartphone running ActiveCaptain.
Best for: Boaters with limited helm space who want keyed controls, CHIRP and ClearVü sonar, and stated US coastal and inland chart support.
Not ideal for: Anglers seeking SideVü, buyers who need a large chart-and-sonar display, or owners expecting wireless sharing across non-Garmin systems.
Bottom line: We would choose the 54CV for a compact keyed helm, but not when screen space or SideVü is a priority.
“We would choose the 54CV for a compact keyed helm, but not when screen space or SideVü is a priority.”
As an Amazon Associate we earn from qualifying purchases.
Before You Start
Plan the route while the boat is safely secured. Check the marine forecast, tide and current information, notices to mariners, local restrictions, and any required permits. Confirm that your charts are suitable for the area and note shallow water, rocks, obstructions, traffic separation schemes, restricted areas, and narrow channels. A displayed route is a planning aid, not proof that the water is safe or passable.
Keep a lookout and use other navigation methods while underway. Do not operate the chartplotter in a way that distracts you from steering or watching for traffic. If you are unsure about a setting, return to the manufacturer’s instructions rather than guessing.
Step-by-Step Instructions
Step 1: Confirm the installation and power supply
Inspect the chartplotter, display mount, connectors, and GPS antenna for visible damage, loose fittings, corrosion, or water ingress. Turn on the boat’s power according to its manual, then switch on the chartplotter. Confirm that the display starts normally and that the unit remains powered without flickering or restarting.
Check the manual to identify the antenna and any connected sensors, such as a depth sounder or heading sensor. A chartplotter may still show GPS position without those sensors, but some readings and features may be unavailable or less reliable.
Tip: Do not open the unit or alter wiring while power is on. Treat any damaged cable, hot connector, burning smell, or repeated power loss as an electrical issue and stop using the affected equipment until it is checked.
Check: The display starts and stays on, controls respond, and no visible cable or connector damage is present.
Step 2: Load the correct chart coverage
Insert the compatible chart card as directed in the manual, or activate the manufacturer’s chart service. Open the chart menu and select the area that includes your departure, destination, and planned route. Check the chart title, coverage, edition or update status, and scale where the information is shown.
Zoom in around shallow areas, harbor entrances, and other places where you need detail. A wide-area view may not show every local hazard or depth detail. Compare the electronic chart with an independent chart or official information, and note any gaps or outdated coverage.
Tip: Use charts from an authorized source and follow the provider’s update instructions. Do not assume that a chart card fits every chartplotter or that an update has completed just because the card is inserted.
Check: The chart displays the correct cruising area at useful scales, and the unit recognizes the chart data without an error message.
Step 3: Set position, units, and display preferences
Open the system or navigation settings. Confirm that the coordinate format and chart datum match the chart or position information you will use. Set units for speed, distance, and depth to ones you can read reliably, and verify whether the depth display uses feet, meters, or fathoms.
Choose a readable day or night display mode and adjust brightness so you can see the screen without losing awareness of the surroundings. Leave unfamiliar advanced settings at their defaults until you can check their meaning in the manual. Do not change datum casually; a mismatch can make coordinates appear in the wrong place.
Tip: Record any setting you change. If a coordinate given by a trusted source appears far from the expected location, check the coordinate format and datum before entering it.
Check: You can read the chart, position, and depth units at the helm, and the coordinate format agrees with the references you plan to use.
Step 4: Verify the GPS position and sensor readings
Allow the chartplotter time to acquire a GPS fix in an open area with a clear view of the sky. Open the GPS or satellite-status page and check that the unit reports a valid position and an adequate fix according to its display. Compare the displayed position with your known dock location or another reliable reference.
If a depth sounder or other sensor is installed, check that its data appears and is plausible for the location. Remember that depth readings depend on sensor placement, settings, tide, and local conditions; do not treat a single reading as a guaranteed safe clearance.
Tip: A GPS position can be wrong even when the screen looks normal. If the position is implausible, wait for a fix, inspect the antenna connection, and compare with an independent reference before relying on it.
Check: The unit shows a valid GPS position near your known location, and any connected sensor data is displayed with understandable units.
Step 5: Plan a route using safe, charted waypoints
Open the route-planning tool and create a route from your departure point to your destination. Add waypoints at safe decision points, such as after a harbor entrance or before a turn, rather than placing them directly on hazards or uncertain chart areas. Zoom in while placing each point and check its location against charted depths, navigation marks, restricted areas, and your independent reference.
Review the complete route at both wide and close scales. Check the legs for shallow water, obstructions, sharp turns, traffic conflicts, and areas where conditions may change. Adjust the route to suit your vessel’s draft, expected tide, operating limits, and the conditions forecast for the trip.
Tip: Do not follow a straight route across land or shallow water simply because the plotter draws a line. A route line shows geometry; it does not prove that the water is navigable.
Check: The route begins and ends at the intended locations, its waypoints are visible and ordered correctly, and every leg has been reviewed for hazards.
Step 6: Set alarms and check route information
Review the chartplotter’s alarm options in the manual. Set only alarms you understand and can respond to, such as an anchor alarm when appropriate. If the device offers an off-course or shallow-water alarm, choose a setting that fits your boat and local conditions, accounting for sensor limits and the water level reference.
Check the route’s direction, leg distance, estimated information, and next waypoint. Treat estimated arrival times and similar calculations as planning aids, not promises. Confirm that any route-following or autopilot functions are configured according to their manuals; do not activate an autopilot until you understand how to disengage it immediately.
Tip: An alarm cannot replace a lookout or active monitoring. Poorly chosen depth or off-course thresholds can create false alerts or fail to warn you in time.
Check: You know which alarms are active, what each alert means, and how to cancel or respond to it.
Step 7: Test the setup before departure
While still dockside, reopen the chart, GPS status, route, and any sensor pages you expect to use. Confirm that the route is active only if you intend to follow it, the first waypoint is correct, and the display does not show a lost-GPS or chart-data warning. Check that you can switch between chart scales and return to the vessel’s position display.
Keep an independent navigation reference ready and brief anyone sharing watch duties on the chartplotter’s basic controls and alarms. Once underway, compare the displayed position and route progress with visible marks, depth information, and conditions. Slow down or stop in a safe place if the information does not agree.
Tip: Do not learn unfamiliar controls in a busy channel. Practice zooming, panning, and returning to the vessel’s position before leaving the dock.
Check: The chartplotter shows a credible position on the correct chart, the planned route is available, and you can locate key controls without searching through menus.
Common Mistakes to Avoid
- Assuming a chartplotter route automatically avoids hazards. — Inspect every route leg at a close chart scale and compare it with current chart information, tide and current data, local notices, and an independent reference.
- Using the wrong chart area, chart edition, coordinate format, or datum. — Check chart coverage and update status, then match coordinate settings to the references used to plan or enter positions.
- Trusting a depth reading or alarm without checking its limits. — Confirm the displayed depth units and sensor settings, account for tide and sensor placement, and keep visual and other navigation checks in use.
Troubleshooting
Problem: The chartplotter does not acquire a GPS position.
Solution:
Move to a location with a clearer view of the sky, wait for the unit to acquire satellites, and check the antenna connection and GPS status page. Restart only as directed in the manual. If the unit still has no fix, use independent navigation methods and have the antenna or equipment checked before relying on it.
Problem: The chart is blank, missing, or shows the wrong area.
Solution:
Check that the chart card is fully inserted and compatible, that the subscription or activation is valid, and that the correct chart layer and area are selected. Confirm the map is not simply panned away from the vessel or zoomed to an unhelpful scale. Follow the chart provider’s troubleshooting instructions if coverage still fails.
Problem: The displayed position does not match the known location.
Solution:
Check the coordinate format and datum, wait for a stable GPS fix, and compare the position with a reliable independent reference. Inspect the antenna and its connection. Do not follow the route until you can account for the discrepancy.
Problem: Depth or other sensor readings are missing or implausible.
Solution:
Check whether the sensor is powered and selected, inspect its connection, and confirm the correct units and settings. Consult the equipment manual for sensor placement and operating limits. Treat uncertain readings as unavailable and use other safe navigation information.
What Success Looks Like
Your chartplotter is ready for use when it displays the correct, usable chart coverage; reports a credible GPS position near your known location; shows understandable units and any connected sensor data; and contains a route whose waypoints and legs you have checked for hazards. You can identify active alarms, operate the basic display controls, and compare the plotter’s information with an independent reference. If any of these checks fail, do not treat the unit as a reliable source for that trip.
Next Steps
Before each trip, check the forecast, notices, tides and currents, route conditions, chart status, and GPS fix. Review the route again if your destination, draft, weather, or water levels change. Keep the chartplotter clean and dry according to its manual, update authorized chart data as directed, and record any settings that work for your vessel. Practice with the controls in safe conditions. If the position remains unreliable, charts do not load, or wiring appears damaged, use other navigation methods and contact the manufacturer or a qualified marine technician.
Frequently Asked Questions
Can I navigate using only a marine chartplotter?
No. Use it alongside a lookout, current charts or other independent references, weather and tide information, and sound seamanship. Electronic equipment can lose power, GPS reception, or chart data, and displayed information can be incomplete or inaccurate.
Do I need a chart card if the chartplotter has a basemap?
It depends on the model and cruising area. A built-in basemap may not provide the detail needed for safe route planning. Check the manufacturer’s specifications and confirm that chart coverage, detail, and update status suit your area before departure.
Why does my GPS position appear shifted from a charted location?
Possible causes include an incorrect coordinate format or datum, a weak or inaccurate GPS fix, outdated chart data, or differences between chart sources. Check settings and compare with a reliable reference. Do not adjust the datum by guesswork.
Should I follow the route line exactly?
No. Monitor surrounding water, marks, traffic, depth, and changing conditions. The route line is a planned track, not a guarantee of safe water. Change course when conditions or reliable navigation information call for it.