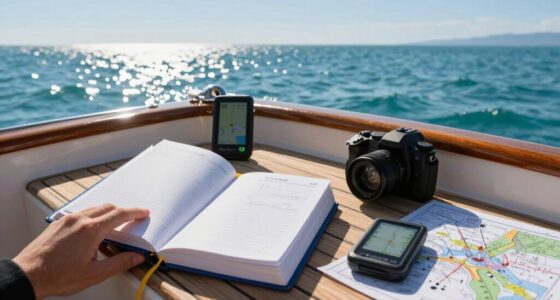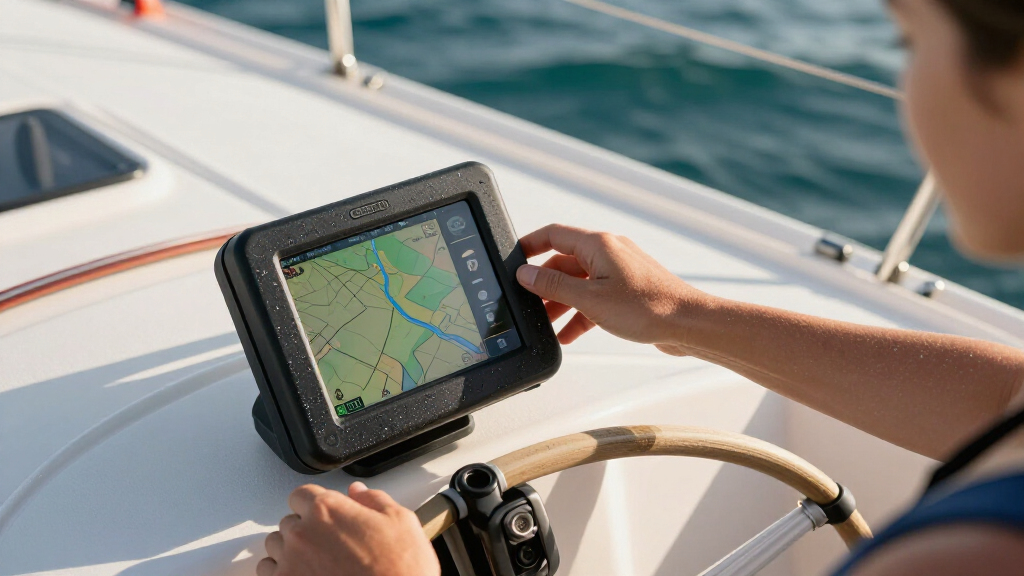
Use a marine GPS navigation system to check your vessel’s position, plan a route, and monitor progress while underway. This guide is for boaters who are new to chartplotters or need a reliable setup routine. Allow 30-60 minutes to prepare and plan a route before departure; time underway depends on the trip.

Get sports gear delivered free — and shop member deals
- Fast, free delivery on millions of items
- Access to Prime Big Deal Days deals on October 6–7
- Prime Video, Amazon Music and more included

Garmin ECHOMAP UHD2 94sv Chartplotter with GT56 Transducer
- ✔ Display: 9-inch touchscreen
- ✔ Transducer: GT56-TM included
- ✔ Sonar: Traditional, ClearVü, and SideVü

Simrad GO9 Chartplotter and Fish Finder with HDI Transducer and C-MAP Discover Charts
- ✔ Display: GO9 multifunction display
- ✔ Charts: C-MAP Discover chart card
- ✔ Chart coverage: US and Canada

Garmin GPSMAP 79sc Marine Handheld GPS with BlueChart g3 Coastal Charts
- ✔ Display: 6-inch color display, 240 x 400 resolution
- ✔ Water resistance: IPX6, unit level only
- ✔ Maps: Preloaded BlueChart g3 coastal charts
Difficulty: Beginner | Time: 30-60 minutes for setup and route planning; navigation time varies
What You’ll Need
Tools & Materials:
- Marine GPS chartplotter or GPS receiver with current nautical charts
- Vessel’s intended departure point, destination, and alternate stopping points
- Compass or another independent means of checking direction
- Paper chart or separate navigation device as a backup
- Vessel manual and device manual
Knowledge:
- Basic understanding of latitude and longitude
- Ability to identify hazards and navigation markers on a nautical chart
- Knowledge of local boating rules and weather sources
Check the chart’s coverage and update date, and confirm that the device supports the chart format. A GPS position depends on satellite signals; it does not show every hazard or replace lookout, depth monitoring, local notices, or prudent seamanship.
Garmin ECHOMAP UHD2 94sv Chartplotter with GT56 Transducer
The Garmin ECHOMAP UHD2 94sv earns the top spot for buyers who want chartplotting and fishing sonar together in a fixed display. Its 9-inch touchscreen is described as sunlight-readable, and the included GT56-TM transducer supports traditional sonar plus ClearVü and SideVü. That combination gives coastal boaters more ways to interpret what is below and beside the boat than the Simrad GO9’s listed CHIRP and DownScan Imaging package.Garmin Navionics+ coastal charts are built in, so the system is presented as a ready-to-use coastal navigation package rather than a screen that depends on a separately listed chart card. Wi-Fi can share sonar data, waypoints, and routes with another ECHOMAP UHD2 chartplotter. That is useful for boaters building a compatible setup, though the sharing benefit is most relevant when a second matching display is part of the plan.Compared with the portable GPSMAP 79sc, this Garmin is a much more capable helm centerpiece, but it is also a fixed installation with a transducer and a larger screen to accommodate. Its supplied details do not specify chart region coverage or water-resistance rating, so buyers should confirm those fit their cruising area and mounting location. For a single display that balances coastal navigation with extensive sonar choices, it is the clearest all-around pick in this lineup.
Pros:
- Built-in Garmin Navionics+ coastal charts
- GT56-TM transducer includes traditional, ClearVü, and SideVü sonar
- Sunlight-readable 9-inch touchscreen
- Wi-Fi sharing of sonar data, waypoints, and routes with another ECHOMAP UHD2
Cons:
- Fixed chartplotter format is less portable than the GPSMAP 79sc
- Wireless sharing is specifically described for another compatible ECHOMAP UHD2 unit
- The supplied details do not state chart region coverage or a water-resistance rating
Best for: Coastal boaters who want an installed chartplotter with included charts, a multi-view sonar transducer, and Wi-Fi route sharing.
Not ideal for: Boaters seeking a portable handheld, or buyers who need confirmed chart coverage and installation details before selecting a unit.
Bottom line: For boaters outfitting a helm, the ECHOMAP UHD2 94sv offers the strongest overall blend of included coastal charting and varied sonar in this group.
“For boaters outfitting a helm, the ECHOMAP UHD2 94sv offers the strongest overall blend of included coastal charting and varied sonar in this group.”
Simrad GO9 Chartplotter and Fish Finder with HDI Transducer and C-MAP Discover Charts
The Simrad GO9 is a strong fit for sportboats, center consoles, and smaller cruisers that need navigation and fishing electronics on one multifunction display. It includes C-MAP Discover charts with stated coverage in the US and Canada, along with built-in GPS and an HDI transducer. CHIRP sonar and DownScan Imaging add useful fishing views without requiring buyers to piece together a chart card and transducer separately.Against the Garmin ECHOMAP UHD2 94sv, the GO9’s advantage is its combination of charting with radar support and smartphone or tablet mirroring. Garmin’s listed sonar range is broader, however, with traditional, ClearVü, and SideVü views from its included GT56-TM. The Simrad’s CHIRP and DownScan package may be sufficient for many smaller boats, but buyers focused on multiple sonar perspectives should compare the Garmin more closely.Wi-Fi and NMEA 2000 provide ways to connect the GO9 with compatible devices and boat systems. The key qualification is radar: the description says the display supports radar, which does not establish that radar hardware is included. We would treat it as an expansion path and account for any required radar option. Its stated target of smaller boats also makes the handheld Garmin a more practical fit when portability matters more than a permanent helm screen.
Pros:
- C-MAP Discover chart card covers the US and Canada
- Includes built-in GPS and an 83/200 kHz HDI transducer
- CHIRP sonar and DownScan Imaging combine navigation and fish finding
- Wi-Fi, NMEA 2000, and display mirroring support connected use
Cons:
- Radar is described as supported, and radar options may be required
- Designed for smaller boats and may not suit larger vessels
- Its listed sonar modes are less varied than the Garmin ECHOMAP UHD2 94sv package
Best for: Owners of sportboats, center consoles, or smaller cruisers who want included US and Canadian charts with GPS and fishing sonar in one display.
Not ideal for: Owners of larger vessels, buyers who require included radar hardware, or anglers prioritizing the Garmin’s listed ClearVü and SideVü sonar options.
Bottom line: The GO9 makes the most sense for smaller boats needing a charted multifunction display, provided buyers understand radar may require additional equipment.
“The GO9 makes the most sense for smaller boats needing a charted multifunction display, provided buyers understand radar may require additional equipment.”
Garmin GPSMAP 79sc Marine Handheld GPS with BlueChart g3 Coastal Charts
The Garmin GPSMAP 79sc serves a different purpose from the two fixed chartplotters: it is a floating handheld for portable marine navigation and backup. Preloaded BlueChart g3 coastal charts and support for GPS, GLONASS, BeiDou, Galileo, QZSS, and SBAS give it a broad positioning and charting foundation. It can store up to 10,000 waypoints and 250 routes, which suits boaters who want to carry saved locations and planned routes between outings.Its rugged design includes a sunlight-readable 6-inch color display, fogproof and scratch-resistant glass, and a tilt-compensated electronic compass. Those traits make it more practical as a carry-along unit than either helm display, and it floats if dropped overboard. The IPX6 rating is specified for the unit level only, though, so buyers should not assume that every connected part or accessory has the same protection.Compared with the ECHOMAP and GO9, the GPSMAP 79sc gives up integrated transducer sonar, fixed-display scale, and the connected helm role. Its battery life is up to 20 hours in GPS mode, which calls for a charging plan on longer trips. We see it as a useful compact navigation companion or a fit for boaters who need handheld operation, rather than a replacement for a larger chartplotter with fishing sonar.
Pros:
- Floating handheld design with rugged marine-oriented construction
- Preloaded BlueChart g3 coastal charts and support for multiple satellite systems
- Stores up to 10,000 waypoints and 250 routes
- Tilt-compensated electronic compass and barometric altimeter
Cons:
- Six-inch display is smaller than a fixed helm chartplotter
- IPX6 water resistance is specified for the unit level only
- Up to 20 hours of GPS-mode battery life requires planning for longer outings
Best for: Boaters who want a floating handheld with preloaded coastal charts, extensive waypoint storage, and multiple satellite system support.
Not ideal for: Anyone who needs a permanent helm display, included fishing sonar, or a navigation unit intended to run without battery planning on longer trips.
Bottom line: The GPSMAP 79sc is the portable choice for backup or handheld coastal navigation, but it cannot match the fixed units’ integrated sonar capabilities.
“The GPSMAP 79sc is the portable choice for backup or handheld coastal navigation, but it cannot match the fixed units’ integrated sonar capabilities.”
As an Amazon Associate we earn from qualifying purchases.
Before You Start
Keep a lookout and use more than one source of navigation information. GPS can show where the receiver is, but it may not show temporary closures, uncharted obstructions, changing depths, or current conditions. Check local notices, weather, tides, and currents before departure. Do not enter restricted or shallow water based on a GPS line alone.
Learn how your device marks a waypoint, builds a route, zooms the chart, and returns to the position display. Menu names vary by model. Set up and review the route while stopped in a safe place, not while steering through traffic.
Step-by-Step Instructions
Step 1: Power on and check the GPS
Turn on the chartplotter and wait for it to acquire a satellite position. Confirm that the displayed position, date, time, and GPS status appear normal. Check the vessel’s location against a known harbor, landmark, or other reliable position source.
Tip:Allow extra time for a receiver that has been moved, reset, or unused for a long period. Keep the antenna clear of obstructions as directed by the device manual.
Check: The screen shows a stable position in the expected area, with no lost-signal warning.
Step 2: Check the chart and display settings
Open the chart view and confirm it covers the entire trip, including the departure area, destination, and any planned alternate stops. Review the chart scale and zoom in around narrow channels, entrances, and hazards. Set units to those you can interpret consistently, such as nautical miles and knots, and check that depth units match local charts.
Tip:Do not assume a chart is current just because it opens. Check its edition or update information and consult current local notices for changes.
Check: Chart symbols and depth figures are readable, and the route area is visible at suitable scales.
Step 3: Review conditions and identify hazards
Check the latest forecast, visibility, wind, tides, and currents for the planned time and area. On the chart, identify shallow water, rocks, reefs, wrecks, restricted areas, traffic lanes, and any narrow passages along the way. Compare charted depths with your vessel’s draft and the expected tide.
Tip:Account for uncertainty in charted depths and tide predictions. Leave a safe margin for the vessel, waves, squat, and local conditions.
Check: You can name the main hazards on the route and have decided whether conditions support the trip.
Step 4: Mark the destination and route points
Use the chartplotter’s waypoint function to mark the destination. Add intermediate waypoints where the route needs to change direction or pass a channel entrance, turn, or other identifiable point. Place each waypoint in navigable water, away from hazards and restricted areas. Review the route line against the chart instead of accepting automatically generated routing without inspection.
Tip:Give waypoints clear names so you can distinguish route points from fishing spots or saved locations. A straight line between points may cross land or unsafe water.
Check: The route appears in the intended order and does not visibly cross charted hazards or prohibited areas.
Step 5: Set an arrival and cross-track alert
Choose an arrival alert radius suited to the waypoint and your vessel’s speed, then set a cross-track error limit that gives you time to respond. Check that sound and visual alerts are enabled and that the alert volume is audible from the helm. Use the device manual for model-specific settings.
Tip:Alerts support watchkeeping; they do not steer the vessel or replace regular position checks.
Check: The device displays the alert settings you selected and can provide an audible or visible warning.
Step 6: Save the route and prepare a backup
Save the route with a recognizable name. Write down the waypoint order and key bearings or positions on a paper chart or trip notes, and make sure a separate backup navigation method is ready. Tell a responsible person your planned route and expected return time according to your normal float-plan practice.
Tip:Keep backup information accessible if power or the chartplotter fails. A phone may lose signal or power offshore, so do not rely on it as your only backup.
Check: You can reopen the saved route, and the essential route information is available without the chartplotter.
When underway in safe conditions, select the saved route and activate guidance to its first waypoint. Confirm that the displayed course leads toward that point through navigable water. Compare GPS direction and position with the compass, chart, landmarks, and observations from your lookout. Check progress regularly and slow or stop when visibility, traffic, or conditions require it.
Tip:GPS course over ground reflects movement across the water, which can differ from the vessel’s heading because of wind or current.
Check: Your position advances along the intended route, and independent checks agree within reasonable limits.
Step 8: Respond to alerts and arrival
When an arrival or cross-track alert sounds, check your actual position and surroundings before changing course or acknowledging the alert. Select the next waypoint only after confirming the vessel is clear to turn. At the destination, verify the position against local landmarks and chart details, then deactivate route guidance when you no longer need it.
Tip:Do not follow a suggested turn blindly. The safe maneuver depends on traffic, depth, weather, and local rules.
Check: You reach the intended area, confirm it visually or through another reliable reference, and leave route guidance in the appropriate state.
Common Mistakes to Avoid
- Following a direct route line without checking what lies between waypoints. — Inspect the chart at a detailed scale and move or add waypoints to keep the route in navigable water.
- Trusting old charts or treating charted depths as exact. — Check chart update information, local notices, tides, and conditions; leave a margin for depth uncertainty.
- Confusing vessel heading with GPS course over ground. — Compare both readings and account for wind and current when interpreting differences.
- Relying on the chartplotter as the only navigation source. — Carry and know how to use an independent backup, keep a lookout, and check position against the chart and surroundings.
Troubleshooting
Problem: The GPS position is missing or jumps unexpectedly.
Solution: Check satellite status and antenna placement, confirm the unit has power, and wait for a stable fix. Compare with a backup position source; do not rely on an uncertain fix near hazards.
Problem: The chartplotter cannot show the required chart area.
Solution: Check that the chart card or subscription is installed, active, and compatible with the device. Use a current paper chart or another suitable navigation source until coverage is available.
Problem: The route line crosses land, shallow water, or a restricted area.
Solution: Stop route following when safe, inspect the chart at a larger scale, and reposition or add waypoints. Check local restrictions and depth conditions before proceeding.
Problem: An alert sounds repeatedly or at an unexpected point.
Solution: Check the selected waypoint, arrival radius, cross-track limit, and actual vessel position. Adjust settings only after confirming the route and surrounding water are safe.
What Success Looks Like
The GPS shows a stable position in the correct area, the saved route covers the intended trip through navigable water, and alerts are configured and audible. While underway, position checks agree reasonably with the chart, compass, and observed surroundings. You can state what backup method you will use if the GPS or chart display becomes unavailable.
Next Steps
After the trip, note any discrepancies, new hazards, or useful route changes for future planning. Check for chart updates and device software updates according to the manufacturer’s guidance. Before each later voyage, review the forecast, notices, route, and backup equipment again.
Frequently Asked Questions
Can I use a marine GPS without an internet connection?
Many chartplotters receive GPS satellite signals without internet access, but you need suitable charts stored on the device or chart card. Check your model and chart coverage before departure.
Does a GPS chartplotter replace a compass or paper chart?
No. Keep an independent way to check direction and position, and carry a backup chart or navigation method appropriate for your trip. The chartplotter can fail or lose its position fix.
How often should I check my position while underway?
Check often enough to stay aware of route progress and hazards, and more frequently in confined water, poor visibility, traffic, or changing conditions. Do not use a fixed interval as a substitute for keeping watch.
Why does the GPS course differ from the compass heading?
The GPS usually reports course over ground, the direction the vessel is moving across the earth. Wind and current can push the vessel sideways, so course over ground can differ from the direction the bow points.
Fall Picks
fall essentials
As an affiliate, we earn on qualifying purchases.